Creating and managing custom table styles in Excel allows you to define consistent formatting that aligns with your personal or organizational preferences. Follow the detailed steps below to create, edit, apply, or remove a custom table style.
Creating a Custom Table Style
-
Navigate to the Home tab on the Ribbon and click Format as Table.
-
At the bottom of the style gallery, click New Table Style to open the customization window.

-
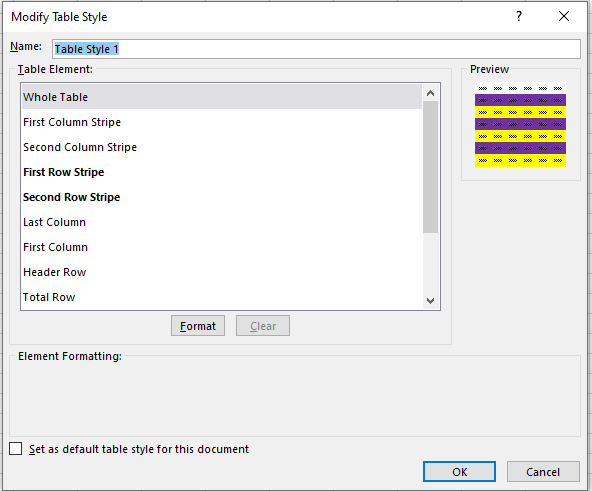
In the New Table Quick Style dialog box, you can assign a custom name to your new style. For this example, we will retain the default name.
-
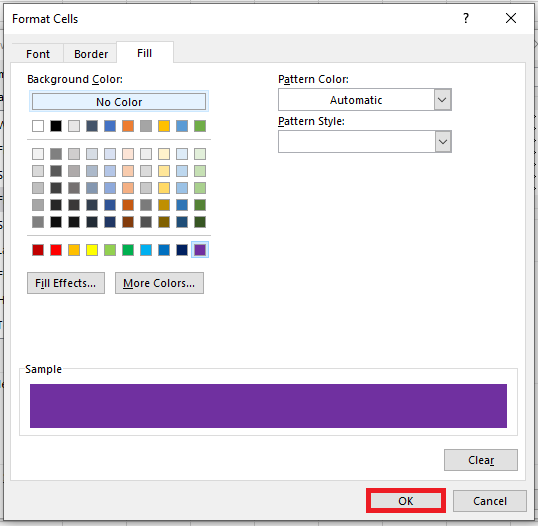
From the Table Element list, select the component you wish to format first — for instance, Header Row.
-
Click the Format button to open the cell formatting dialog.

-
In the Format Cells window, apply the desired formatting options. For example, you can set a specific background color, font style, or border for the header row.
-
Once you’re done with the formatting for that element, click OK to return to the style editor.
-
Repeat the process for other elements in the Table Element list, such as banded rows, total row, or first/last column.
-
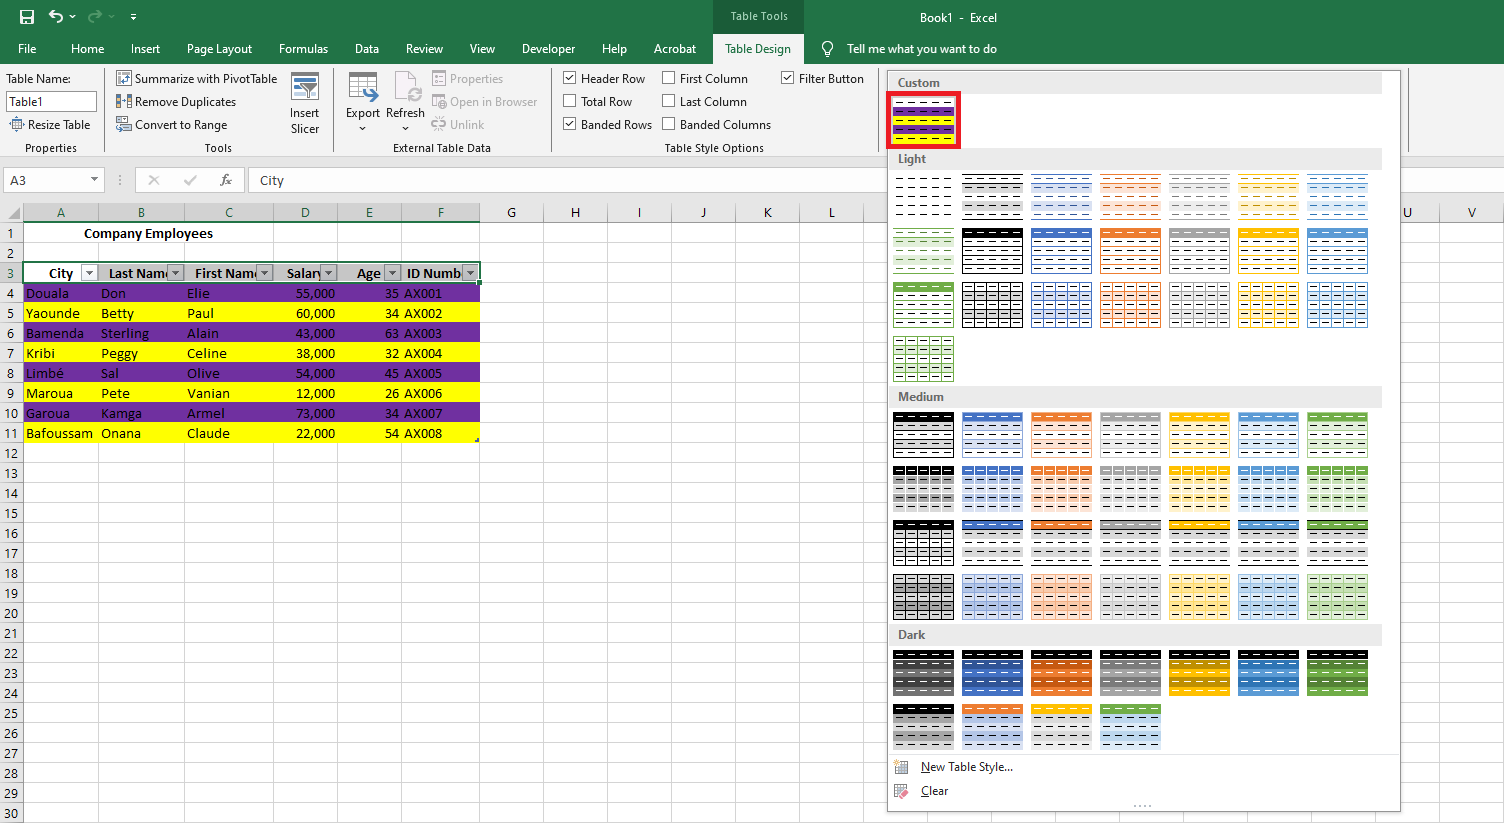
As you make changes, a Preview box shows how your table will look with the applied formatting.
- Optionally, you can adjust the stripe size for banded rows or columns. This determines how many rows or columns each stripe covers.

-
At the bottom, you’ll find a checkbox labeled Set as default table style for this document. Select this if you want all new tables in this workbook to use your custom style by default.
-
When finished, click OK to save the new style.
Your custom table style is now created and available for use in the current workbook.
Applying a Custom Table Style
-
Select any cell within the range you wish to convert into a table.
-
Click Format as Table in the Home tab toolbar.
-
Scroll through the style gallery to locate your newly created style.
-
Hover over the style to preview how it would look on your table.
-
Click on the style to apply it.
Note: Custom table styles are workbook-specific. They will not be available in other Excel files unless redefined.
Modifying a Custom Table Style
-
Go to the Format as Table menu in the Ribbon.
-
Right-click on the custom style you wish to change.
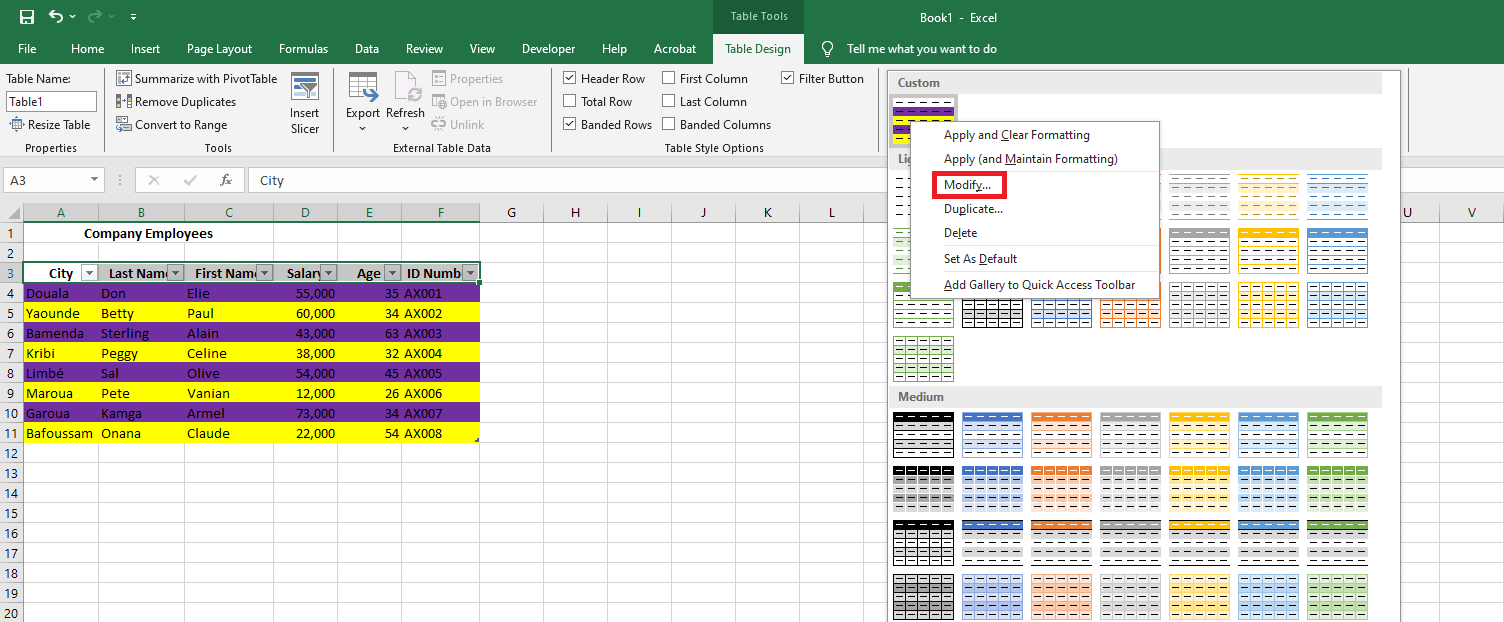
- From the context menu, select Modify. This reopens the style editor where you can change the formatting settings.
- Alternatively, if you want to create a slightly different version while keeping the original intact, choose Duplicate instead.
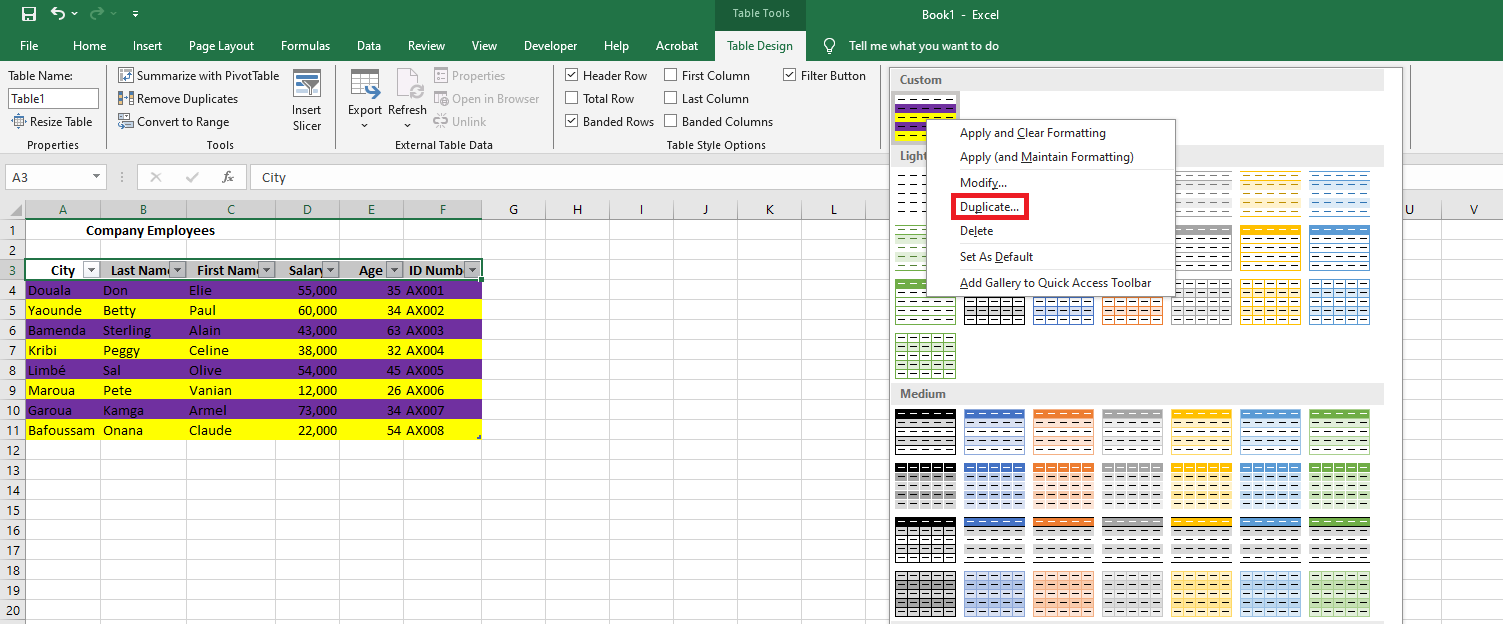
- Excel will append “2” to the name of the duplicated style, which you can rename as needed.

-
Click OK once you’ve finalized the changes. Now, both the original and duplicated styles will appear in the gallery.

Deleting a Custom Table Style
If a custom style is no longer needed and hasn’t been applied to any tables, you can remove it to free up memory.
-
Open the Format as Table menu.
-
Right-click the style you want to remove.
- Select Delete from the context menu.

-
Confirm the deletion by clicking OK when prompted.

If any tables currently use the deleted style, Excel will revert them to the default formatting.