Types of Document Properties
Before learning how to view, edit, and delete document properties (metadata) in Excel, let’s clarify the types of properties an Office document can have:
- Type 1: Standard Properties – These are common to all Office applications. They include basic information about the document such as Title, Subject, Author, Category, etc. You can assign your own text values to make documents easier to search on your PC.
- Type 2: Automatically Updated Properties – These include system-controlled data such as file size, creation/modification date, or application-specific properties such as page count, word count, or application version.
- Type 3: Custom Properties – These are user-defined properties that allow you to add additional metadata to your Office document.
- Type 4: Organization Properties – Specific to your organization.
- Type 5: Document Library Properties – These refer to documents stored in a document library on a website or public folder. The person who creates the library can define certain property fields and validation rules that must be filled or corrected before uploading files.
Viewing Document Properties
To find your document’s properties in Excel:
- Go to File > Info
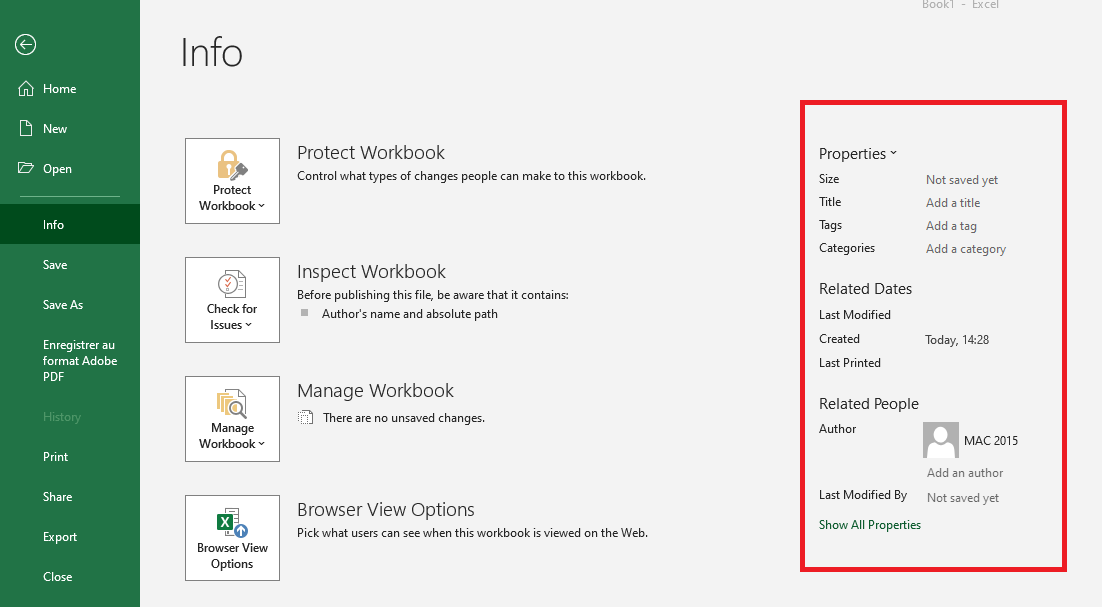
- Click on Properties > Advanced Properties

- The Properties dialog box will appear.

Here you can view general information, statistics, and content details. You can also edit the document summary or set custom properties.
Editing Document Properties
When viewing document properties, you can instantly add or correct information.
To add an author quickly:
- Go to File > Info
- In the Related People section, hover over Add an author and click it
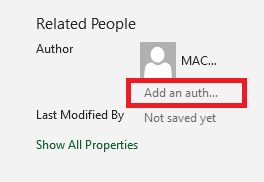
- Type the author’s name
- Click anywhere in the Excel window to save
You can also use this method to modify the title, tags, or category.
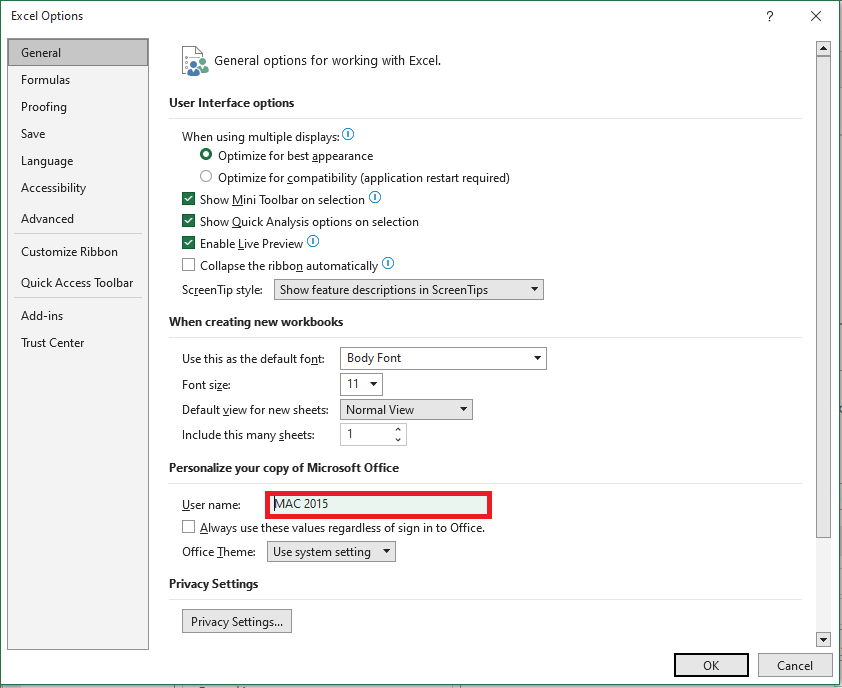
By default, Excel uses your Windows username as the document author. To change this:
- Click File > Options
- Select General on the left
- Scroll to Personalize your copy of Microsoft Office
- Enter your actual name in the User name field
- Click OK
Defining Custom Properties
To add custom document properties:
- Go to File > Info
- Click Properties > Advanced Properties
- In the dialog box, go to the Custom tab
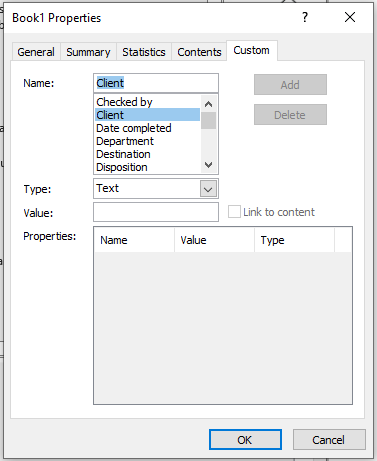
- Enter a name or select one from the predefined list
- Choose the data type
- Enter a value
- Click Add
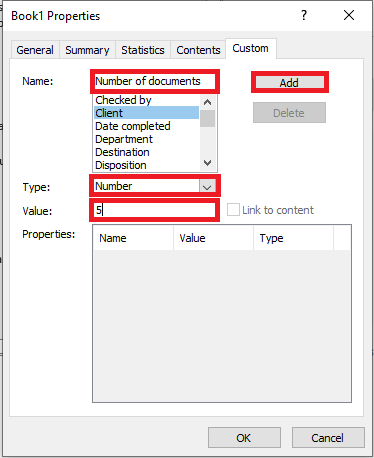
NOTE:
The value format must match your selection in the Type list. This means that if the selected data type is Number, you must enter a number in the Value field. Values that do not match the property type are saved as text.
- The custom property will appear in the list. Click OK to save.
The value must match the selected data type (e.g., numbers for number fields). If not, the value will be saved as text.

To remove a custom property, select it in the list and click Delete > OK.
To modify metadata beyond author, title, tags, and category:
- In the document panel, place your cursor in the desired field and edit.
- In the Properties dialog, switch to the Summary tab and update fields. Click OK—changes are saved automatically.
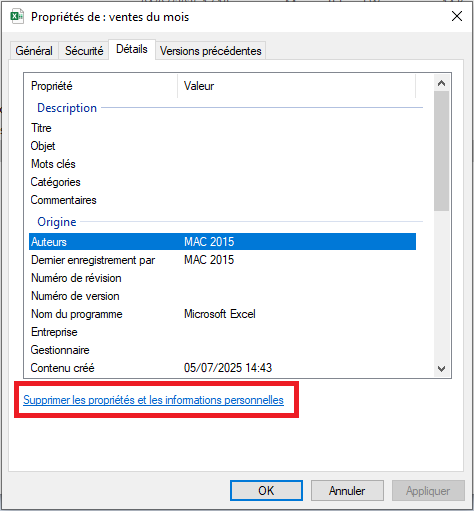
Deleting Document Properties
To remove your name or organization from document properties:
Use the Document Inspector
This tool scans your document for hidden data and personal info.
- Go to File > Info
- Click Check for Issues > Inspect Document
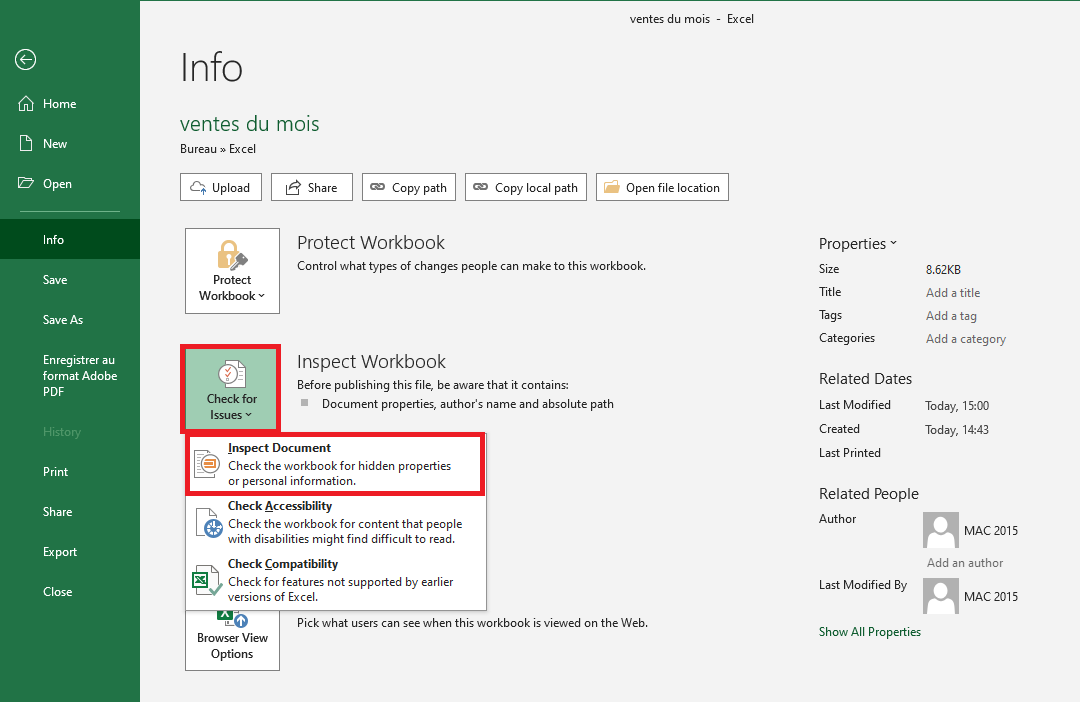
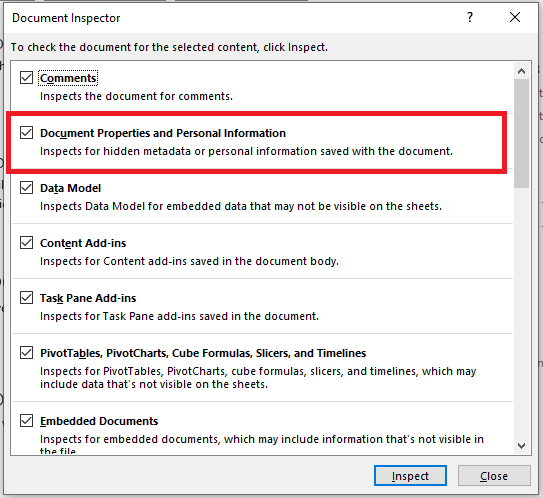
- The Document Inspector window opens. All checkboxes are selected by default—leave them checked.
- Click Inspect
- Once results appear, click Remove All under each category of interest—especially Document Properties and Personal Information
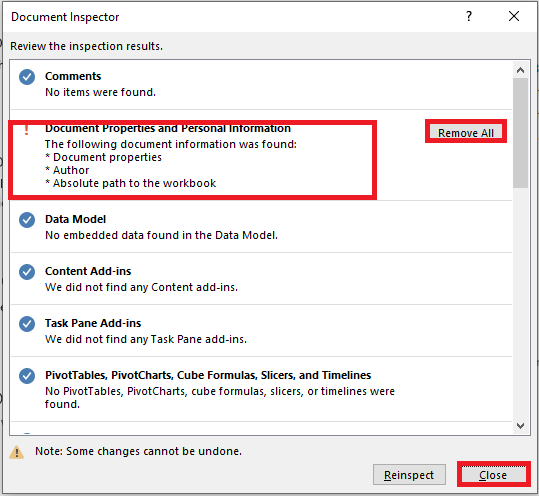
- Close the Inspector.
- (Recommended) Save the file under a new name to keep an original copy with metadata intact.
Remove Metadata from Multiple Files
To delete properties from several files at once using Windows Explorer:
- Open the folder containing the Excel files
- Select the desired files
- Right-click and choose Properties
- Go to the Details tab
- Click Remove Properties and Personal Information
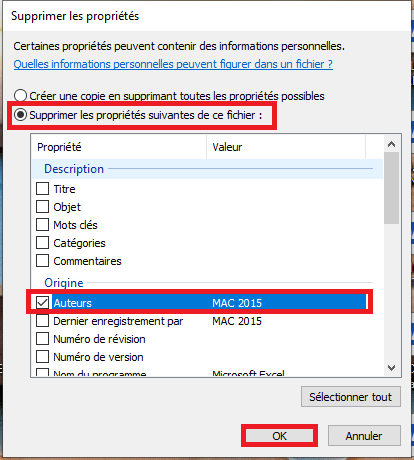
- Select Remove the following properties from this file
- Check specific fields or click Select All
- Click OK
Protect Document Properties
If you want to prevent others from modifying metadata:
- Go to File > Info
- Click Protect Workbook (under the Permissions section)
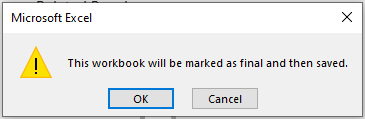
- Choose Mark as Final

- A prompt will inform you that the document will be marked as final and uneditable. Confirm or cancel.
If you want to allow specific people to modify the workbook, you can set a password:
- Stay in Backstage view (File tab).
- Choose Save As
- At the bottom of the dialog, click Tools > General Options
- Enter a password in the Password to modify field
- Click OK
Figure 1.4.6-s: Protect Document Properties - Confirm the password
- Click OK
Figure 1.4.6-t: Protect Document Properties - Select a folder and click Save.
Your file is now protected from unwanted changes.
Note: Anyone with the password can remove it from the same dialog box, so it’s not completely tamper-proof.