When we create a chart using data on a worksheet, by default, the chart is created on the same sheet and can be moved using the mouse. However, sometimes it’s better to have a standalone chart that fits entirely on its own sheet and remains fixed in place. In this article, we’ll learn how to move a chart from a worksheet to a new chart sheet.
Steps to move the selected chart to a new chart sheet:
- Select the chart and go to the Design tab.

- You will see the Move Chart icon on the far-right corner of the ribbon in Excel. Click it.
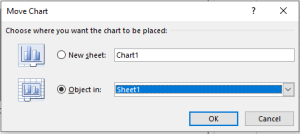
- In the Move Chart dialog box, click the New sheet radio button. Change the chart name if desired.
- Click OK. The chart will be moved to a new chart sheet.
In a chart sheet, the chart is properly fitted and fixed in place, but you can still perform all chart-related tasks. This sheet belongs to the workbook. The chart is designed to fit this sheet, making it ideal for data presentation.
You can also move other charts onto the same sheet, but those charts will float while the first chart remains as the sheet background.
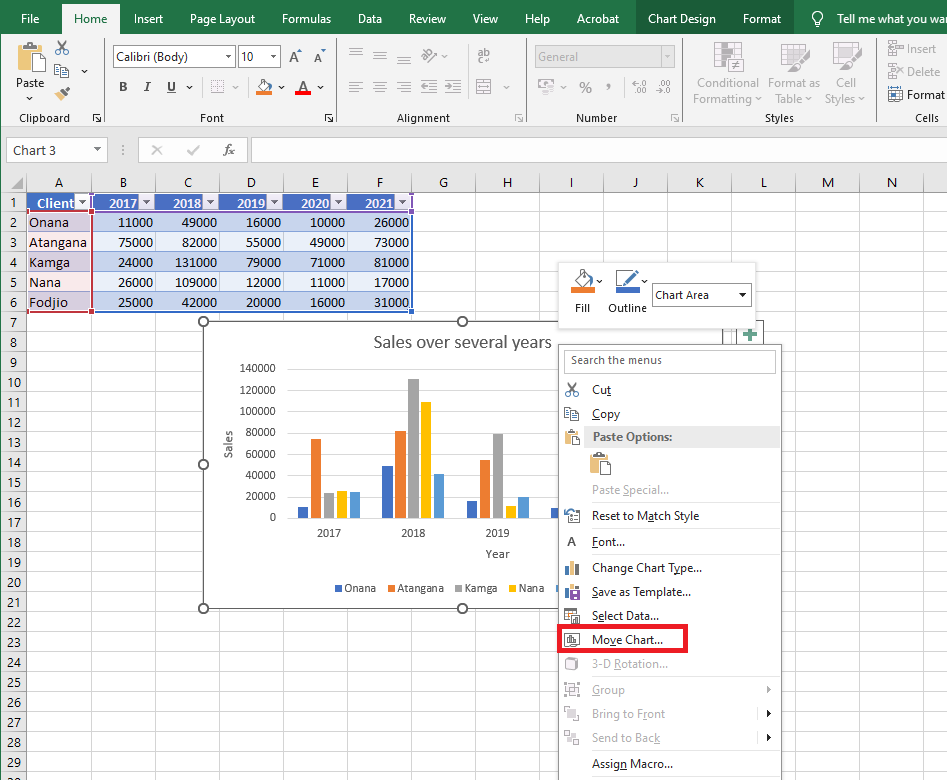
You can also move the chart by right-clicking on it. When you right-click the chart, you will see an option Move Chart…. Click it. The same Move Chart dialog box will appear.
Moving a chart from one worksheet to another
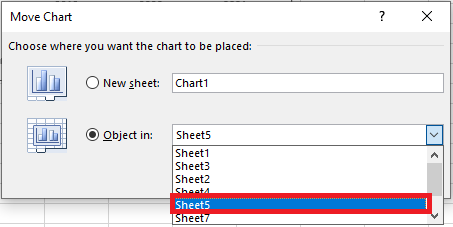
If you want to move the chart to another standard worksheet, select the Object in option. From the dropdown list, select the desired worksheet name. Press OK. The chart will be moved. The same can be done using standard cut and paste.
Moving a chart from a chart sheet back to a worksheet
On the chart sheet, right-click the chart. Click Move Chart. Select Object in and choose the desired sheet from the dropdown list.
Press OK. The chart will be returned to the standard worksheet. The chart sheet will be deleted.