Sometimes you zoom in on an Excel worksheet to better organize its layout. Other times, you zoom out to get an overview of certain values.
There are four methods available to adjust the zoom level in Excel.
Method 1: Using IntelliMouse
By default, scrolling the mouse wheel moves the worksheet up or down. But you can use it to zoom in or out on the worksheet.
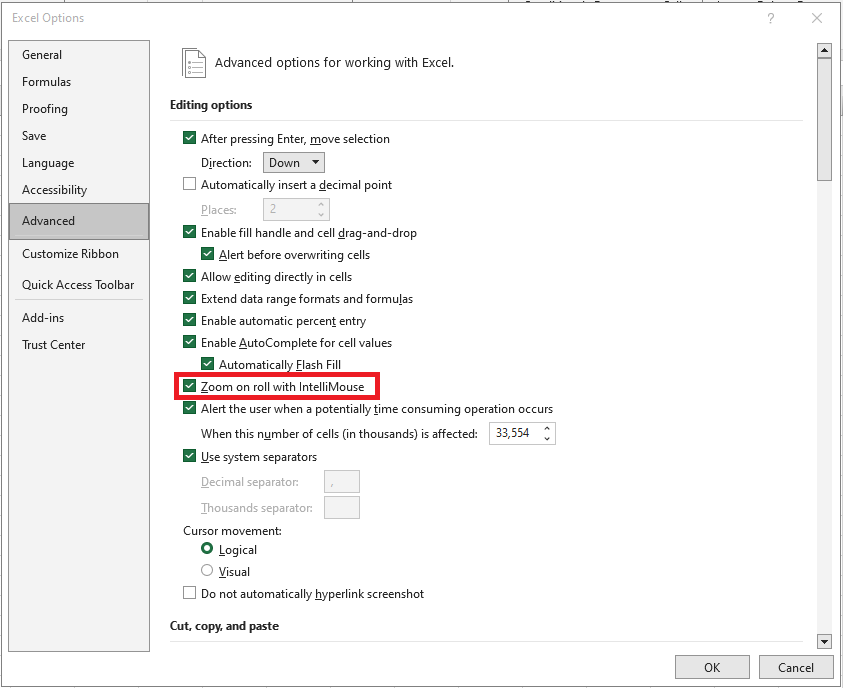
- Click the File tab on the ribbon
- Click Options
- In the Excel Options window, go to the Advanced tab
- Under Editing options, check Zoom on roll with IntelliMouse
- Click OK
Now, when you scroll the mouse wheel:
- Scrolling up zooms in
- Scrolling down zooms out
The zoom changes in 15% increments.
Note: With this feature enabled, the scroll wheel no longer moves the worksheet. If you want to move through the worksheet, refer to our previous article on 3 practical ways to navigate a worksheet in Excel.
To disable this feature later, just uncheck the same box in Step 4.
Method 2: Using the Zoom Slider
Instead of using IntelliMouse, you can also use the zoom slider found in the bottom-right corner of the Excel window.
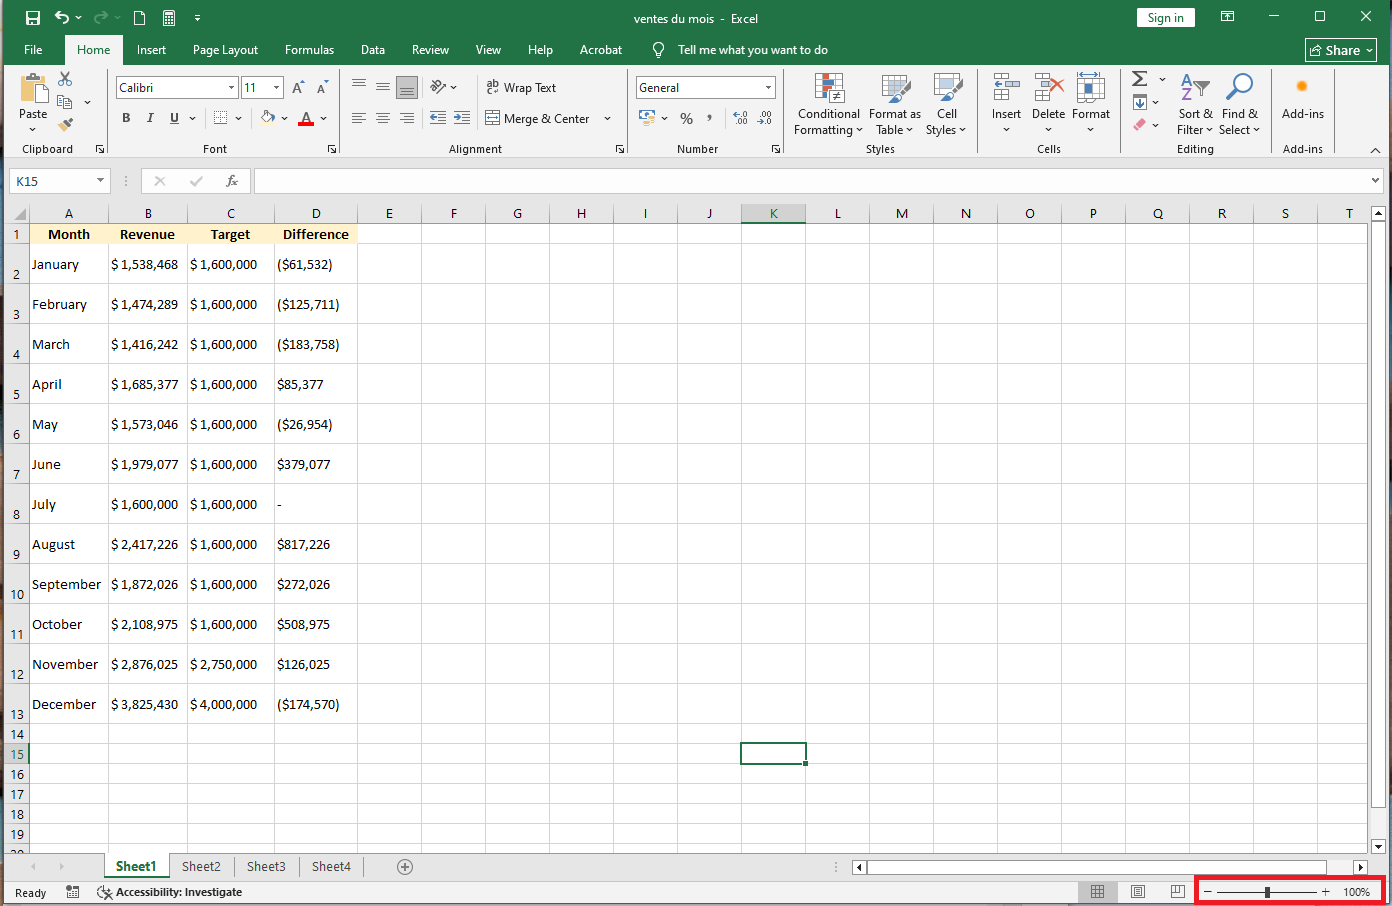
Click the Zoom Out or Zoom In buttons to change the view (each click adjusts the zoom by 10%)
- You can also click anywhere on the slider itself
- The center point (middle of the slider) represents 100% zoom
- Clicking to the right zooms in
- Clicking to the left zooms out
You can also click on Zoom Level to manually adjust the zoom.
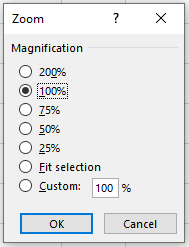
When you click Zoom Level, a dialog box appears where you can:
- Choose a preset zoom level
- Enter a custom percentage
- Choose Fit Selection, which zooms in to make the selected range fill the screen
Method 3: Using the View Tab Toolbar
You can also change the zoom level using the View tab on the ribbon.
Under the Zoom group, there are three options:

- Zoom: Opens the same dialog box as the Zoom Level button
- 100%: Immediately sets the zoom level to 100%
- Zoom to Selection: Zooms in to make the selected range fill the screen (same as « Fit Selection » in the Zoom dialog)
So, the toolbar offers a quick way to manage zoom.
Method 4: Adding Zoom Buttons to the Quick Access Toolbar
If you prefer to customize the Quick Access Toolbar, you can also add zoom-related buttons there:
- Click the downward arrow at the end of the Quick Access Toolbar
- Select More Commands… from the dropdown
- In the Choose commands from dropdown, select All Commands
- Scroll through the list to find the zoom-related buttons
- The 100% button is located near the beginning
- Six other zoom buttons are found near the end of the list
- For each button, click Add to place it on the Quick Access Toolbar

- After adding the necessary buttons, click OK to confirm

You now have dedicated zoom buttons available at all times in the Quick Access Toolbar.