You may often find yourself in a situation where you need to print the Excel sheet containing important data to be shared in hard copy. In such cases, page layout becomes essential. Once you learn how to handle this in Microsoft Excel, printing pages becomes easier. Several operations are involved in setting up the page, such as:
-
Adjusting the margins for top, bottom, left, and right
-
Adding a header or footer to the Excel sheet you want to print
-
Page views: Portrait, Landscape, or Custom
-
Setting the print area, etc.
We will review all the page setup settings and options one by one in this section. It’s very easy in Excel to configure the page before printing and preview it to make adjustments as needed.
Page Layout Using the View Tab
Let’s suppose we have data as shown below.

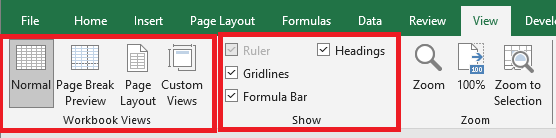
Click on the View tab in the Excel ribbon at the top of your sheet. You will see several options under two groups: Workbook Views and Show. Under Workbook Views, you will find different types of views: Normal view, Page Break Preview, Page Layout, Custom Views.
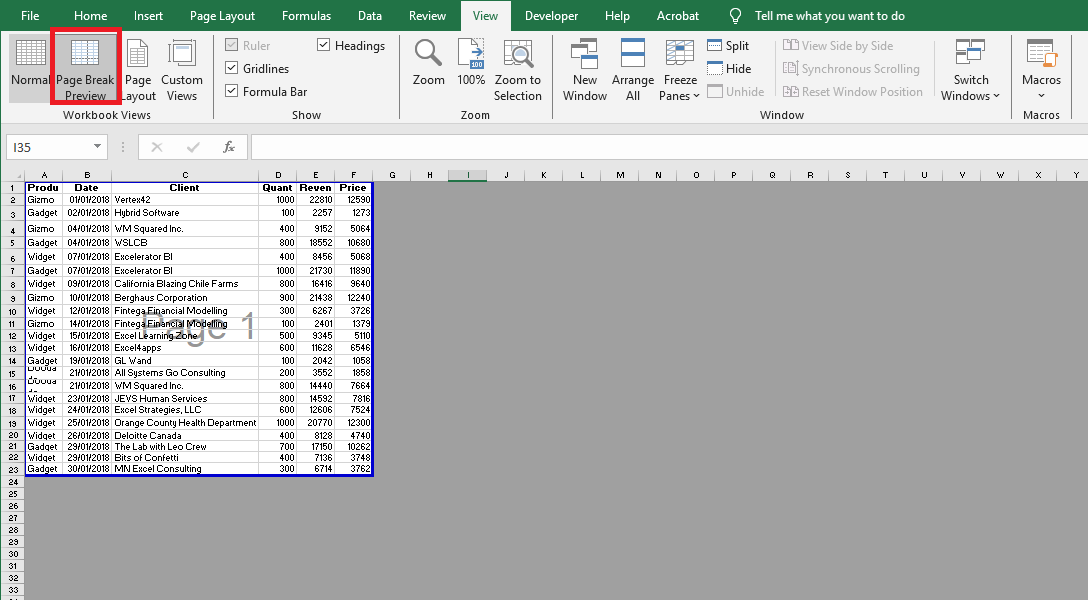
Click Page Break Preview. It will split your page based on the print area, as shown below.
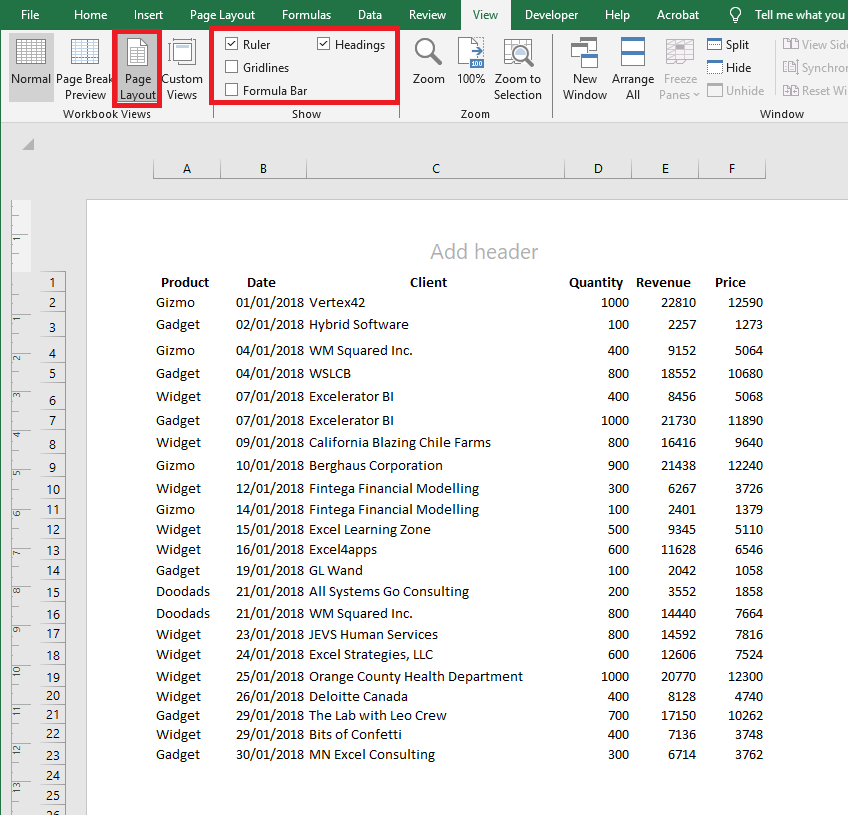
Click the Page Layout option to see the Excel sheet in layout format. It already shows the default header, and you can add « Sales Data for the Year 2018 » as a title. Under the Show option, you can check or uncheck various options such as ruler, gridlines, etc.
Setting Margins
Sometimes, the columns on your print page take up the entire width, and one column still doesn’t fit, causing it to be printed on the next page. To solve this, we can use the Margins option under the Page Layout tab in Excel.
Click the Page Layout tab in Excel. You’ll see a variety of commands, each with several options.
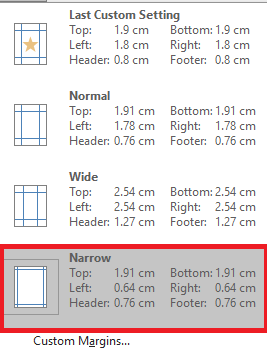
Under Page Setup, click the Margins button. You’ll see different margin presets: Custom, Normal, Wide, and Narrow. Choose the one that best suits your needs.

Click Narrow Margins to tighten the space and fit more columns on one page.
You can also use the Page Setup dialog box to configure margin settings.
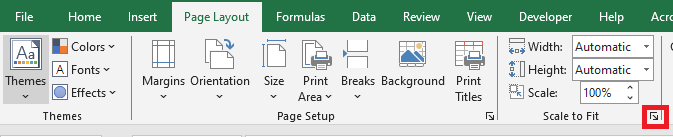
Click the Page Layout tab, then in the Page Setup group, click the Dialog Box Launcher.

Enter the margin settings and preview the results in the Preview area:
-
Top, Bottom, Left, Right: Adjust the values to specify the distance between your data and the edges of the printed page.
-
Header or Footer: Enter a value to adjust the distance between the header/footer and the top/bottom of the page. This must be smaller than the margin to prevent overlap.
-
Center on Page: Center your data on the page horizontally, vertically, or both by checking the appropriate boxes.
Page Orientation in Page Layout
Sometimes adjusting margins isn’t enough to fit all your columns on one page. In that case, you may need to change the page orientation.
Go to the Page Layout tab and select the Orientation button next to Margins.
Clicking Orientation will show two options: Portrait and Landscape.
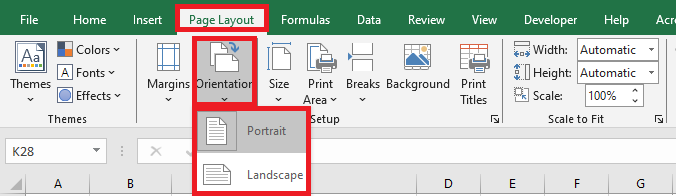
By default, orientation is set to Portrait. Change it to Landscape to ensure all columns are visible on one printed page.
Adjusting Page Size in Page Layout
You can also modify the paper size for a proper printout. Go to the Page Layout tab and click the Size button. This lets you choose the paper size for your printed document.
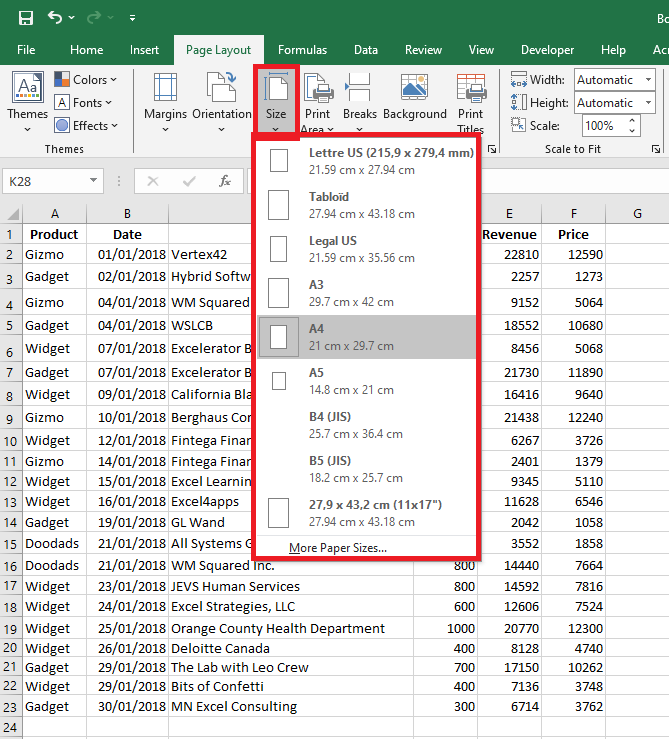
A list of paper sizes will appear, such as Letter, Legal, A4, A3, etc. By default, it may be set to Letter (especially after changing the orientation to Landscape).
Click A4 to set the page size to A4, which is the most commonly used paper format.
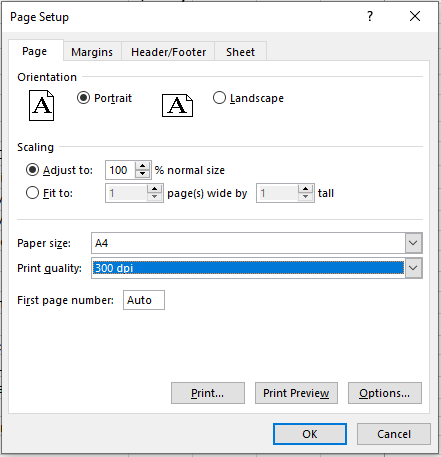
You can also use the Page Setup dialog box to configure the Page tab options.
Click the Page Layout tab, then click the Dialog Box Launcher in the Page Setup group.
-
Orientation: Choose between Portrait and Landscape.
-
Scaling: Enlarges or reduces the worksheet or selection to fit the specified number of pages when printed.
-
Adjust to: Enter a percentage to scale the worksheet.
-
Fit to: Enter a number of pages wide and/or tall. To fill the page width and use as many pages as needed vertically, type 1 for pages wide and leave the height blank.
-
-
Paper Size: Choose Letter, Legal, or another format depending on what you want for your printed document.
-
Print Quality: Choose a resolution (DPI – dots per inch). Higher resolution provides better print quality if supported by the printer.
-
First Page Number: Enter « Auto » to start numbering at 1, or enter a different number to start from another page number.
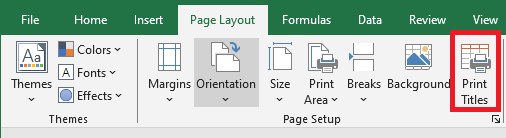
Print Titles in Page Layout
If your data is long—say, 10,000 rows—it will certainly span multiple pages. The problem is that column headers are only printed on the first page. For subsequent pages, it becomes hard to know which column is which. Printing column titles on each page is essential.
Click the Page Layout tab and then the Print Titles button.
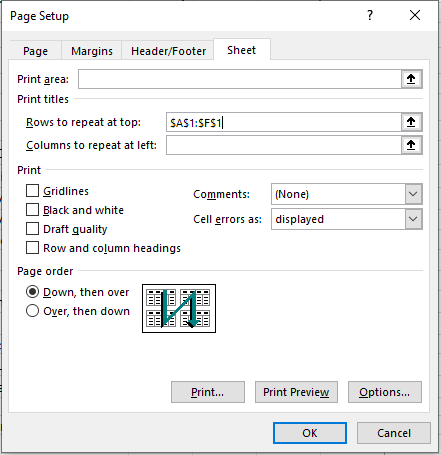
Clicking Print Titles opens the Page Setup window with the Sheet tab active.
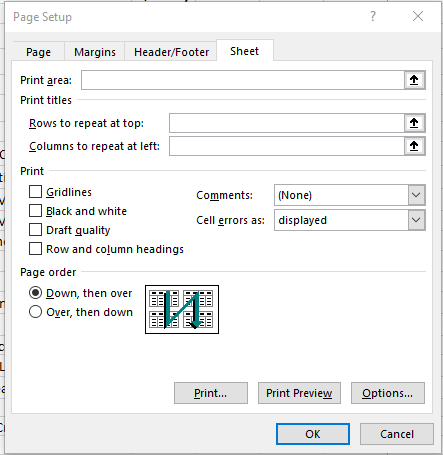
Under this tab, click the Rows to repeat at top field. This lets you specify which rows will be printed at the top of every page. For example: $A$1:$F$1.
You can also set the Print Area, Columns to repeat at left, and more in this Sheet tab. Click OK once you’re done.
Summary and Things to Remember
-
Print Area: Click inside the Print Area field, then drag to select the range you want to print. The collapse dialog button helps you shrink the dialog to select from the worksheet. Click it again to return to the full dialog.
-
Print Titles:
-
Use Rows to repeat at top for horizontal titles.
-
Use Columns to repeat at left for vertical titles.
Then select the relevant cells in your worksheet.
-
-
Print Settings:
-
Gridlines: Check this box to print gridlines. They are not printed by default.
-
Black and White: Use this if your printer is color-capable but you want black and white output.
-
Draft Quality: Enables faster, lower-quality printing if supported by your printer.
-
Row and Column Headings: Include these in the printout by checking the box.
-
Comments and Notes:
-
At end of sheet: Print all notes on a summary page.
-
As displayed on sheet: Print notes where they appear on the sheet.
-
None: Default setting; comments are not printed.
-
-
-
Cell Errors As: Choose how to display errors in printouts:
-
As displayed (default)
-
<blank>
-
—
-
#N/A
-
-
Page Order: Choose Down, then over or Over, then down to set how Excel numbers and prints pages. A preview image shows the order.