On the other hand, if you are developing your own application, you will of course need to create your own buttons that perform actions recorded with a macro or defined by a VBA procedure.
Let us look at an example that demonstrates how to record a macro and assign it to a button placed on the Quick Access Toolbar.
Suppose we need to create a macro that highlights the range A1:K20 on the active worksheet of an Excel workbook and applies the following formatting:
- Fill color — yellow
- Borders — all borders
- Font — Bookman Old Style, size 14 pt
- Font color — red
- Font style — bold
After performing these actions, the cursor should be set in cell A1.
So, open a Microsoft Office Excel 2010 workbook and make sure the cursor is in cell A1.
- Go to the Developer tab on the Ribbon and in the Code group, click Record Macro.
- In the Record Macro dialog box, set the required parameters for the procedure being recorded.
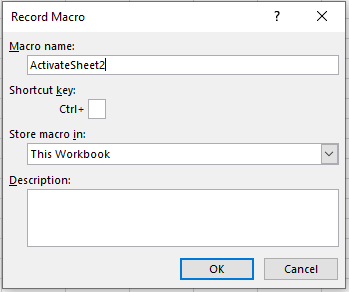
Remember that a macro name cannot contain spaces.
- While in recording mode, perform the required actions in this sequence:
- Go to the Home tab on the Ribbon and select the range A1:K20.
- Using the tools in the Font group on the Home tab, set the following: fill color — yellow; borders — all borders; font — Bookman Old Style; size — 14 pt; font color — red; font style — bold.
- Place the cursor back in cell A1.
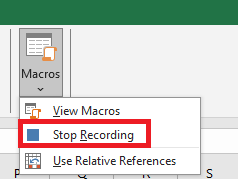
- Click Stop Recording in the Code group on the Developer tab to stop recording the macro.
- Save your workbook under the name Quick Access Toolbar Setup with Macros Enabled .
- Now switch, for example, to Sheet2 of your workbook.
- Click the Macros button in the Code group on the Developer tab.
- In the Macro dialog box,
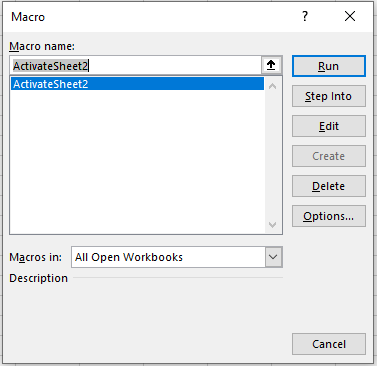
select the name of the macro you created and click Run. Verify that the macro performed all the necessary changes in your workbook .

Note
On the Developer tab, in the Code group, there is a Macro Security button, which opens the Trust Center window in the Macro Settings category.

You can always choose the required option to prevent the execution of malicious code that may be contained in macros from unknown sources.
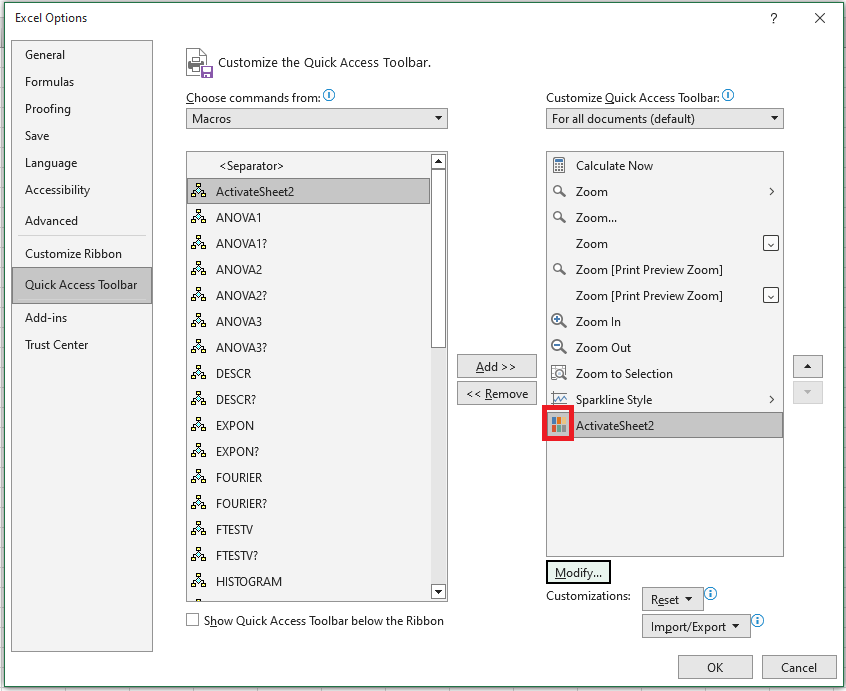
Now let’s assign our created macro to a button on the Quick Access Toolbar.
- Right-click the Quick Access Toolbar and select Customize Quick Access Toolbar.
- In the Excel Options window, in the navigation pane, select the Quick Access Toolbar category, and in the Choose commands from drop-down list, choose Macros.
- In the left column, select the macro you created and click Add to move it to the right column. Notice that at the bottom of the right column the Modify button has become available: it is intended for assigning a button to the corresponding macro. Click Modify.
- In the Modify Button window, select a symbol for the button and type the desired display name for the macro, which will appear as a tooltip on the Quick Access Toolbar. C
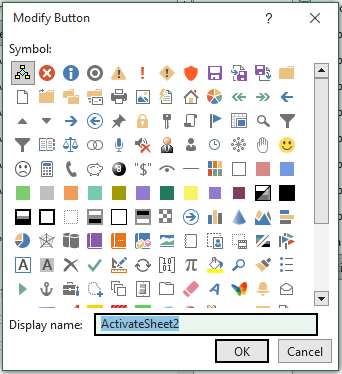
Click OK.
- In the Excel Options window, the button and new name for the macro appear in the right column.
Click OK.
- Make sure that the button with the recorded macro now appears on the Quick Access Toolbar and that clicking it executes the actions you recorded.
