A print area is a range of cells to include in the final printout. If you don’t want to print the entire worksheet, define a print area that includes only your selected data. When you press Ctrl + P or click the Print button on a worksheet with a defined print area, only that area will be printed. You can select multiple print areas on a single worksheet, and each area will print on a separate page. Saving the workbook also saves the print area.
Defining a print area gives you more control over how each printed page looks, and you should always set a print area before sending a worksheet to the printer. Without it, you may end up with cluttered, hard-to-read pages where important rows and columns are cut off, especially if your worksheet is larger than the paper size you’re using.
How to Set the Print Area
To tell Excel which section of your data should appear on a printed copy, use one of the following methods. The fastest way to define a fixed print range is:
- Select the part of the worksheet you want to print.
- On the Page Layout tab, in the Page Setup group, click Print Area > Set Print Area.
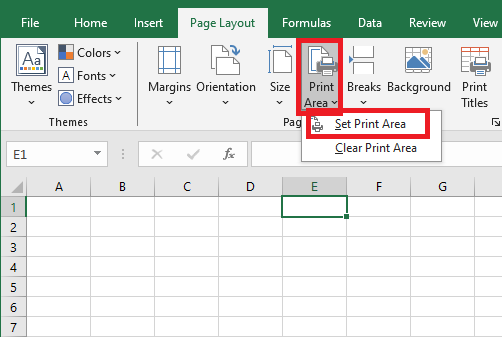
A faint gray line will appear to indicate the print area.
Want to see all your settings? Here’s a more transparent approach to setting a print area:
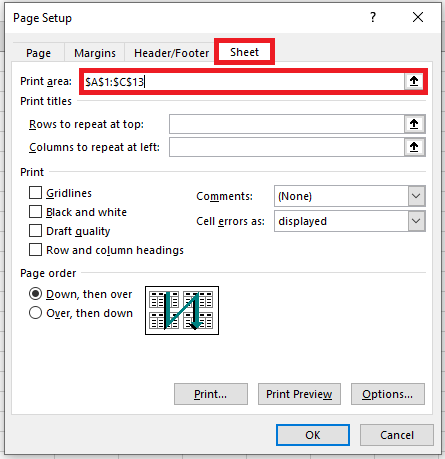
- Under the Page Layout tab, in the Page Setup group, click the dialog box launcher. This opens the Page Setup dialog box.
- Under the Sheet tab, place the cursor in the Print area field and select one or more ranges in your worksheet. To select multiple ranges, remember to hold down the Ctrl key.
- Click OK.
Tips and Notes:
- When you save the workbook, the print area is saved too. Every time you send the worksheet to the printer, only that area will be printed.
- To ensure the defined areas are exactly what you want, press Ctrl + P and preview each page.
- To quickly print a specific portion of your data without setting a print area, select the desired range(s), press Ctrl + P, and choose Print Selection from the dropdown just under Settings.
How to Force Excel to Ignore the Print Area
If you want a hard copy of the entire worksheet or workbook but don’t want to bother clearing all print areas, simply tell Excel to ignore them:
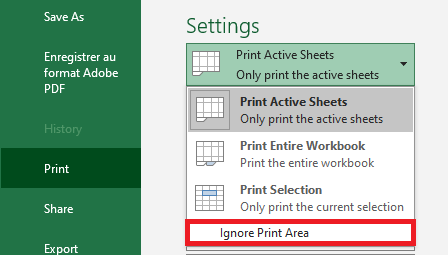
- Click File > Print or press Ctrl + P.
- Under Settings, click the arrow next to Print Active Sheets and select Ignore Print Area.
How to Print Multiple Areas on One Page
The ability to print multiple areas per sheet of paper is controlled by the printer driver, not by Excel. To check if this option is available:
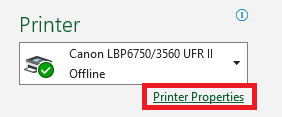
- Press Ctrl + P, click on Printer Properties, and browse through the tabs in the Printer Properties dialog box looking for an option like Pages per Sheet.
If your printer has such an option, you’re in luck. If not, the only workaround I can suggest is to copy the print ranges to a new sheet. Using the Paste Special function, you can link the copied ranges to the original data like this:
- Select the first print area and press Ctrl + C to copy it.
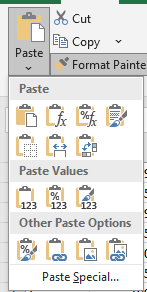
- On a new sheet, right-click any blank cell and choose Paste Special > Linked Picture (also called Paste as Linked Image).
- Repeat steps 1 and 2 for the other print areas.
- On the new sheet, press Ctrl + P to print all the copied print areas on a single page.