Introduction to the Visual Basic Editor (VBE) in Excel
It is fair to say that for many Excel users, worksheets, pivot tables, charts, and hundreds of formula functions are all the tools they need to satisfactorily manage their spreadsheet activities. For them, the familiar workbook environment is the only aspect of Excel they see, and it is obviously the only aspect of Excel they are likely aware of.
But Excel has a separate, less visible environment working behind the scenes called the VBE (Visual Basic Editor), which is interconnected with the workbook environment even if no programming code exists in the workbook. The two environments constantly but quietly work together, sharing information about the workbook as a whole. The Visual Basic Editor is a user-friendly development environment where programmed instructions are stored to make your spreadsheet applications work.
How to Launch the Visual Basic Editor
The VBE icon is found in the Developer tab of the ribbon. By default, the Developer tab is not automatically displayed with the other ribbon tabs. Use the following steps to make the Developer tab visible:
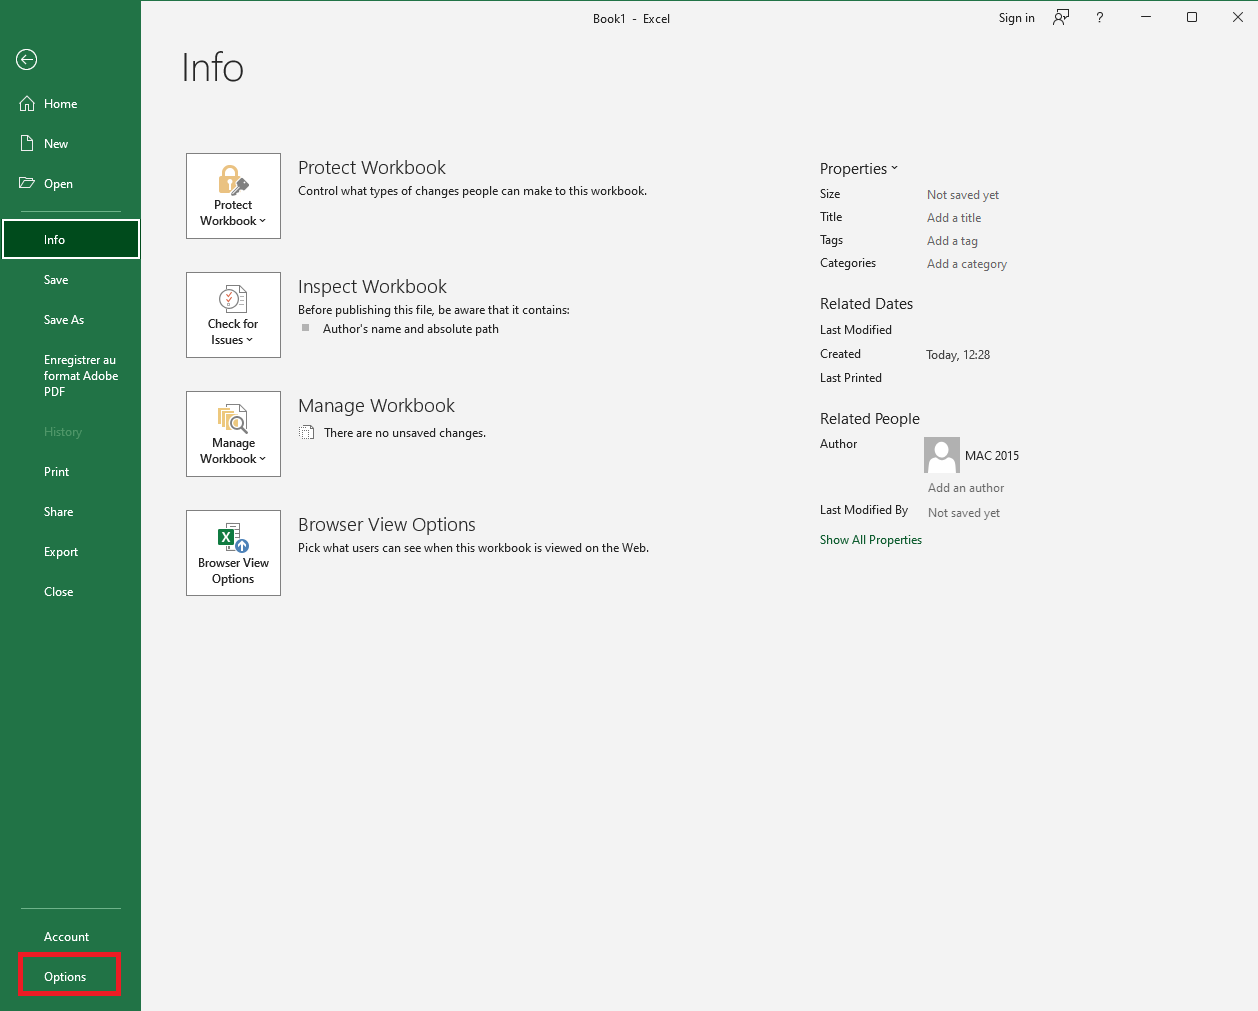
■ Click on the File tab, then click the Options button as shown in Figure. The Options dialog box opens.
■ Click on the Customize Ribbon item on the left, which displays two vertical lists, as shown in Figure 2. Note that the list on the right has a dropdown menu above labeled Customize the Ribbon.
■ Select the Main Tabs item in the Customize the Ribbon dropdown list.
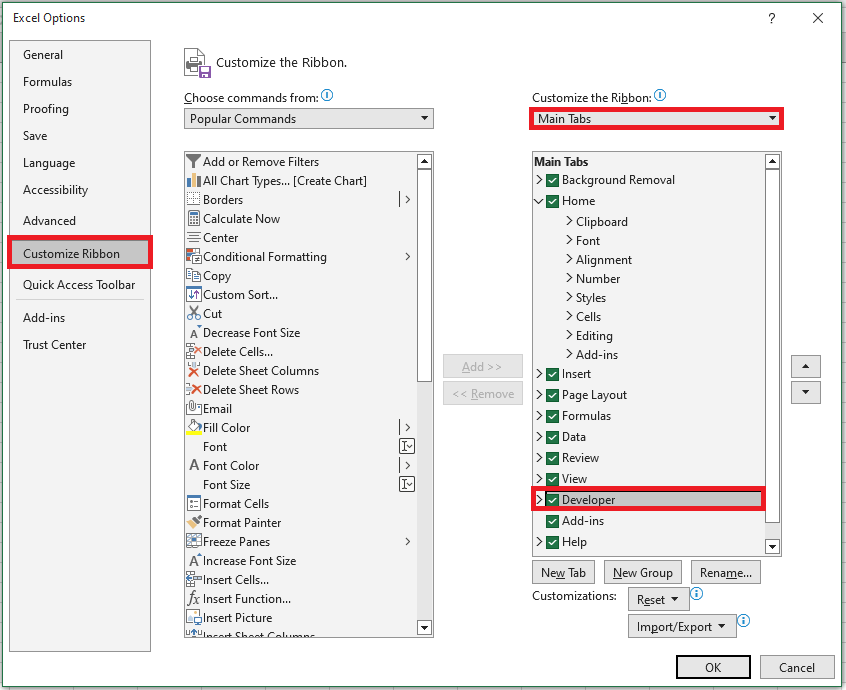
■ In the list of Main Tabs, select Developer and click OK. You will now see the Developer tab in your ribbon, as illustrated in Figure.

To finish, click on the Visual Basic button in the Developer tab of the ribbon, as shown in Figure.

Another quick and easy way to access the Visual Basic Editor is by pressing Alt + F11 on your keyboard. You can do this from any worksheet.
NOTE:
The Alt + F11 keyboard shortcut allows you to access the Visual Basic Editor in all versions of Excel.
Main Windows of the VBE
The Visual Basic Editor can display a number of different windows, depending on what you want to see or do. For most tasks, you should become familiar with four windows: the Project Explorer window, the Code window, the Properties window, and the Immediate window. Figure 1.5 shows what the VBE looks like with these four windows.
Figure 1.5 The four main VBE windows
The Project Explorer Window
The Project Explorer window is a vertical pane on the left side of the VBE. It displays a hierarchical list of currently open projects and their elements. A VBA project may contain the following elements:
■ Worksheets
■ Chart sheets
■ ThisWorkbook: the workbook in which the project is stored
■ Modules: special sheets where programming code is stored
■ Classes: special modules that allow you to create your own objects
■ Custom Forms (UserForms)
■ References to other projects
You can activate the Project Explorer window in three ways:
■ From the View menu, select Project Explorer.
■ From the keyboard by pressing Ctrl + R.
■ From the Standard toolbar by clicking the Project Explorer button.
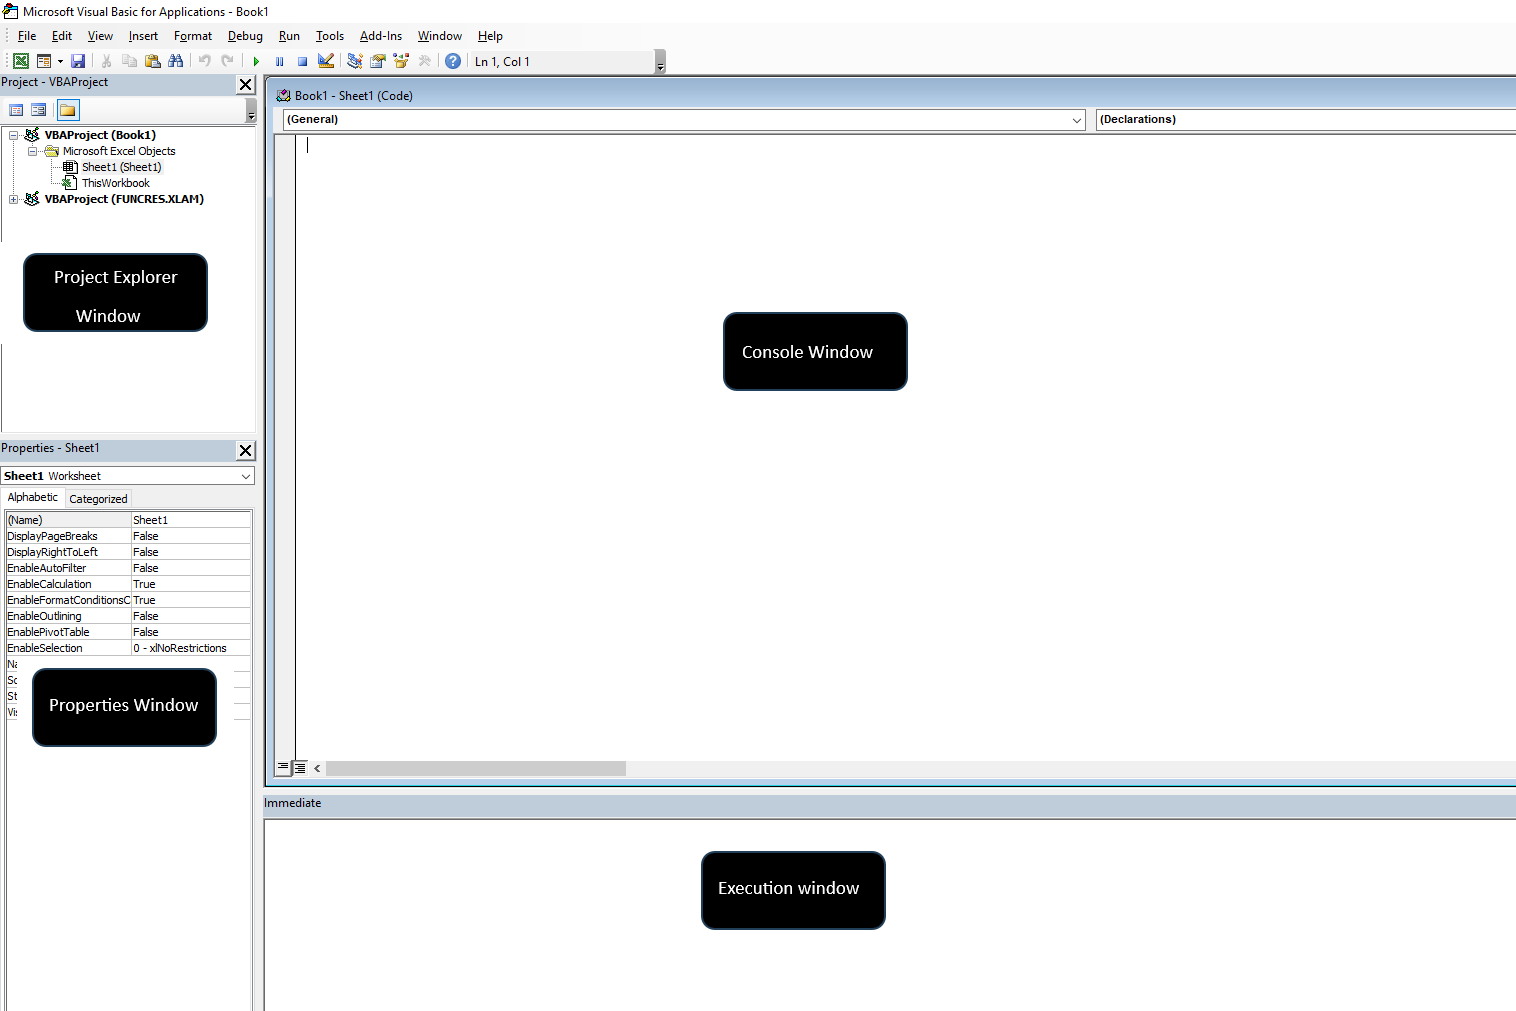
The Code Window
The Code window is used for Visual Basic programming and for viewing and editing recorded macros and existing VBA procedures. Each module can be opened in a separate Code window. There are several ways to activate the Code window:
■ In the Project Explorer window, select the appropriate UserForm or module, then click the View Code button.
■ In the menu bar, choose View | Code.
■ On the keyboard, press F7.
The Code window is made up of several parts:
■ The code input area
■ Two dropdown lists at the top of the Code window, allowing you to quickly navigate through your Visual Basic code
■ The margin indicator bar used by the VBE to display helpful markers during editing and debugging
■ Two icons at the bottom-left of the Code window:
- Procedure View displays one procedure at a time in the Code window
- Full Module View displays all procedures in the selected module
The Properties Window
The Properties window is located in the lower part of the left vertical pane of the VBE. It allows you to view and set properties for various objects in your project. Object properties can be viewed alphabetically or by category by clicking the appropriate tab:
■ Alphabetic Tab: Lists all properties of the selected object in alphabetical order.
You can modify a property’s setting by selecting the property name and typing or selecting the new value.
■ Categorized Tab: Lists all properties of the selected object by category.
You can collapse the list to view categories or expand a category to see its properties. The plus (+) sign to the left of a category name indicates that the list can be expanded. The minus (–) sign means the category is currently expanded.
The Properties window can be accessed in three ways:
■ From the View menu, select Properties Window.
■ From the keyboard by pressing F4.
■ From the toolbar by clicking the Properties Window button.
The Immediate Window
The Immediate window is located at the bottom of the VBE, usually below the Code window, as shown in Figure 5.
The Immediate window is used to try out various instructions, functions, and operators present in the Visual Basic language before using them in your own VBA procedures. The Immediate window allows you to type VBA statements and immediately test their results without writing a full procedure. The Immediate window is like a notepad. Use it to test your statements. If the instruction produces the expected result, you can copy it from the Immediate window into your procedure.
If you do not see the Immediate window in your VBE, press Ctrl + G or, in the VBE menu bar, click View → Immediate Window.
To close the Immediate window, click the Close button in the upper-right corner of the window.