Votre panier est actuellement vide !
Étiquette : macro_objects
Example: Moving Cells in Excel VBA
In the very first macro presented in this book, a recorded macro was used to move the contents of one cell to another:
Sub Macro1()
    Range("A1").Select
    Selection.Cut
    Range("C1").Select
    ActiveSheet.Paste
End Sub
Disadvantages of this approach:
- Multiple steps are required, increasing the chance of errors.
- It is unclear which workbook and worksheet the move operation applies to.
- The process runs more slowly.
Using direct referencing, you can perform this task more clearly and efficiently:
Sub MoveCells()
    ThisWorkbook.Worksheets("Sheet1").Range("A7:A9").Cut _
        Destination:=ThisWorkbook.Worksheets("Sheet1").Range("B7")
End Sub
This method clearly specifies the source and destination ranges within the same workbook and worksheet. It avoids unnecessary selection and pasting steps, resulting in faster and more reliable code.
Filtering Data In Excel VBA
In Excel, you can analyze large datasets efficiently using filters, which let you specify which parts of the data should be visible. This filtering can be automated in VBA using the AutoFilter() method.
For demonstration, the example uses the Products table from the Northwind sample database. This table contains 78 records with six columns each. To illustrate a date filter, a seventh column with random date values is added using the following procedure:
Sub AddDateColumn()
    Dim i As Integer
    Randomize
    ThisWorkbook.Worksheets("Sheet5").Activate
    For i = 2 To 78
        Cells(i, 7).Value = Int(Rnd * 30) + 43900
    Next i
    Range("G2:G78").NumberFormatLocal = "DD.MM.YYYY"
End Sub
Explanation:
- The random number generator creates integer values between 43900 and 43929.
- When formatted as dates, these correspond to March 10, 2020, through April 8, 2020.
- The dates are placed in column 7 (column G).
Basic Number Filter
Sub NumberFilterEqualZero() ThisWorkbook.Worksheets("Sheet5").Activate ActiveSheet.UsedRange.AutoFilter ActiveSheet.UsedRange.AutoFilter 6, "0" End Sub- Calling AutoFilter() without parameters removes existing filters.
- The second call filters column 6 (stock quantity) to show only records where the value equals zero.
- The first parameter is the column number, and the second is the filter criterion.
Number Filter with Comparison Operator
Sub NumberFilterGreaterThan20() ThisWorkbook.Worksheets("Sheet5").Activate ActiveSheet.UsedRange.AutoFilter ActiveSheet.UsedRange.AutoFilter 5, ">20" End Sub- Displays only records where the value in column 5 (unit price) is greater than 20.
- Supported comparison operators: <, >, <=, >=, <>.
- The = operator acts like the equality example above.
Number Filter with Two Conditions on One Column
Sub NumberFilterBetween() ThisWorkbook.Worksheets("Sheet5").Activate ActiveSheet.UsedRange.AutoFilter ActiveSheet.UsedRange.AutoFilter 6, ">20", xlAnd, "<40" End Sub- Filters column 6 (stock quantity) to show only records where values are greater than 20 and less than 40.
- The constant xlAnd specifies the logical AND connection.
Two-Column Filter
Sub DoubleFilter() ThisWorkbook.Worksheets("Sheet5").Activate ActiveSheet.UsedRange.AutoFilter ActiveSheet.UsedRange.AutoFilter 5, ">20" ActiveSheet.UsedRange.AutoFilter 6, ">40" End Sub- Applies two filters sequentially:
- Column 5 (unit price) greater than 20
- Column 6 (stock quantity) greater than 40
- Both filters combine to restrict displayed records.
Text Filters
Single Text Filter
Sub TextFilterEqual() ThisWorkbook.Worksheets("Sheet5").Activate ActiveSheet.UsedRange.AutoFilter ActiveSheet.UsedRange.AutoFilter 3, "Beverages" End Sub- Shows only records where column 3 (category) equals « Beverages ».
Multiple Text Criteria (OR condition)
Sub TextFilterMultiple() ThisWorkbook.Worksheets("Sheet5").Activate ActiveSheet.UsedRange.AutoFilter ActiveSheet.UsedRange.AutoFilter 3, "Beverages", xlOr, "Spices" End Sub- Shows records where the category is either « Beverages » or « Spices ».
- The constant xlOr specifies the logical OR connection.
Text Filters with Wildcards
Starts With
Sub TextFilterStartsWith() ThisWorkbook.Worksheets("Sheet5").Activate ActiveSheet.UsedRange.AutoFilter ActiveSheet.UsedRange.AutoFilter 2, "M*" End Sub- Filters records where the value in column 2 (product name) starts with the letter « M ».
Contains Substring
Sub TextFilterContains() ThisWorkbook.Worksheets("Sheet5").Activate ActiveSheet.UsedRange.AutoFilter ActiveSheet.UsedRange.AutoFilter 2, "*ed*" End Sub- Shows records where the product name contains the substring « ed » anywhere.
Date Filter
Sub DateFilter() ThisWorkbook.Worksheets("Sheet5").Activate ActiveSheet.UsedRange.AutoFilter ActiveSheet.UsedRange.AutoFilter _ 7, ">=2020/3/29", xlAnd, "<=2020/4/3" End Sub- Shows records where the date in column 7 (last purchase date) is between March 29, 2020, and April 3, 2020, inclusive.
- Note: Use American date format (YYYY/MM/DD) for date criteria.
Closing the Excel Application In Excel VBA
The following procedure closes the entire Excel application:
Sub CloseApplication()
    Application.Quit
End Sub
Explanation:
- The Quit() method of the Application object is called.
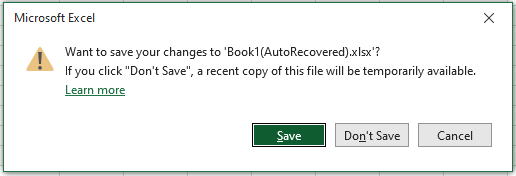
- This method closes Excel completely, including all open workbooks, the Visual Basic Editor (VBE), and the Excel Help window.
- If any workbook has unsaved changes, Excel will prompt the user to save those changes before closing, as shown in Figure 6.10.
Calling a Procedure with a Time Delay In Excel VBA
The following procedure schedules the execution of another procedure at a future time:
Sub CallInFuture()
    Application.OnTime Now + TimeValue("00:00:05"), "ShowApplicationPath"
End Sub
Explanation:
- The method OnTime() of the Application object is called.
- This method is used to execute procedures at a specified future time.
- It requires two arguments: the time at which to run the procedure and the name of the procedure as a string enclosed in double quotes.
- The time can be specified either as an absolute time (e.g., 5:35:30 PM) or as a relative time offset.
- In Listing 6.15, a relative time is used: the current time obtained via the built-in Now() function is incremented by 5 seconds, which is represented using the TimeValue(« 00:00:05 ») function.
- Therefore, the procedure « ShowApplicationPath » will be executed 5 seconds after CallInFuture is run.
Displaying the Application Path In Excel VBA
The following procedure displays the folder path where Microsoft Excel is installed on your computer:
Sub ShowApplicationPath()
    MsgBox Application.Path
End Sub
Explanation:
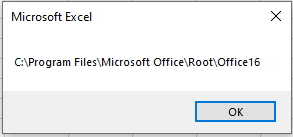
This procedure retrieves the value of the Path property of the Application object and displays it in a message box. The Application.Path property returns the directory on the PC where the Excel application itself is installed.
An example output for a standard installation might look like the one shown in Figure 6.9.
Collections in Excel VBA
You have already encountered some predefined collections in Excel VBA, such as Worksheets and Workbooks. The elements of these collections are fixed by Excel. However, you can also create your own custom collections. Collections allow you to group together elements of the same type or different types that share a thematic relationship.
Compared to arrays, collections provide easier ways to add or remove elements dynamically. One limitation is that all elements in a collection are of the Variant data type.
The Collection object type is used to create collections. Collections provide the following key properties and methods:
- Add() method: Adds an element to the collection.
- Count property: Returns the number of elements in the collection.
- Remove() method: Removes an element from the collection.
Elements in a collection can be accessed either via a For Each loop or by their numeric index.
The following example demonstrates how to create a collection of numbers and work with it:
Sub CollectionExample()
    Dim MyCollection As New Collection
    MyCollection.Add 5.2
    MyCollection.Add 9.6
    MyCollection.Add -3.8
    MyCollection.Add 12.2
    OutputList MyCollection
    If MyCollection.Count >= 2 Then MyCollection.Remove 2
    OutputList MyCollection
    Set MyCollection = Nothing
End Sub

Sub OutputList(X As Collection)
    Dim i As Integer
    Dim Output As String
    Dim Element As Variant
    Output = "Index: "
    For i = 1 To X.Count
        Output = Output & i & ": " & X(i) & " "
    Next i
    MsgBox Output
    Output = "For Each: "
    For Each Element In X
        Output = Output & Element & " "
    Next Element
    MsgBox Output
End Sub
Explanation of the CollectionExample procedure:
- Dim MyCollection As New Collection creates a new collection object and establishes a reference to it.
- The Add() method is used repeatedly to add several numbers to the collection.
- The collection is passed to the procedure OutputList for display.
- The second element of the collection is removed using the Remove() method.
- The collection is displayed again to reflect the removal.
Explanation of the OutputList procedure:
- The parameter X is a reference to a collection object.
- The Count property is used to control the For loop, which accesses elements by their index.
- Alternatively, the elements are output using a For Each loop, which requires a variable of type Variant to iterate over the collection’s elements.
Determining the Object Type in Excel VBA
It is beneficial to declare an object variable with the appropriate type. However, for many objects, the type is not always obvious. In such cases, the TypeName() function proves very useful. You may already know it for determining the data type of a variable, but it can also identify arrays and object types.
If the argument passed to TypeName() is of the Variant data type without an assigned subtype, the function returns « Empty ».
Below is an example using a variety of variables and objects:
Sub DetermineObjectType()
    Dim i As Integer
    Dim a(1 To 5) As Double
    Dim b
    Dim c As Variant
    Dim Ws1 As Worksheet
    Set Ws1 = ThisWorkbook.Worksheets("Sheet1")
    ThisWorkbook.Worksheets("Sheet2").Activate
    Range("A1").Value = TypeName(i)
    Range("A2").Value = TypeName(a)
    Range("A3").Value = TypeName(b)
    Range("A4").Value = TypeName(c)
    Range("A5").Value = TypeName(ThisWorkbook)
    Range("A6").Value = TypeName(ThisWorkbook.Name)
    Range("A7").Value = TypeName(Ws1)
    Range("A8").Value = TypeName(Ws1.Range("A1:A5"))
    Range("A9").Value = TypeName(Ws1.Range("A1:A5").Borders)
    Range("A10").Value = TypeName(Ws1.Range("A1:A5").Font)
    Set Ws1 = Nothing
End Sub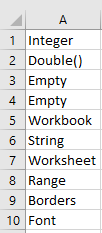
Explanation:
- The types of the variable i (an Integer) and the array a (an array of Double) are recognized by TypeName().
- Variable b, which has no declared data type, defaults to the Variant type. In such cases, TypeName() returns « Empty ».
- Variable c is explicitly declared as Variant, so TypeName() will also return « Empty » if it holds no assigned value.
- Name is a property of type String, representing a text value.
- Borders and Font are sub-objects belonging to the types Borders and Font, respectively.
- This example demonstrates how TypeName() can be used to inspect both simple variables and more complex object hierarchies.
For Each Loop in Excel VBA
The For Each … In … Next loop is used to iterate over collections or arrays. In Excel’s object hierarchy, there are many such collections, for example, Workbooks and Worksheets.
Below is an example using the Workbooks collection, which represents the list of all open Excel workbooks:
Sub ForEachWorkbook()
    Dim WB As Workbook
    Dim Output As String
    Output = "Workbooks: "
    For Each WB In Workbooks
        Output = Output & WB.Name & " "
    Next WB
    MsgBox Output
    Set WB = Nothing
End Sub

Explanation:
- First, the variable WB is declared as a reference to an object of type Workbook.
- The line For Each WB In Workbooks begins the loop. Each element in the Workbooks collection is iterated over.
- Within the For Each loop, the current element is automatically assigned to the variable WB. There is no need to assign it explicitly with Set.
- In this example, the name of each currently opened workbook is concatenated to the output string.
- The Next WB statement advances the loop to the next element. Writing the variable name after Next is optional but can improve readability.
Here is another example using the Worksheets collection, which represents all worksheets in the current workbook:
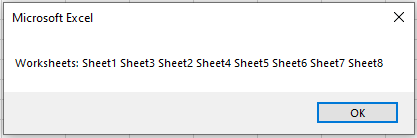
Sub ForEachWorksheet()
    Dim WS As Worksheet
    Dim Output As String
    Output = "Worksheets: "
    For Each WS In ThisWorkbook.Worksheets
        Output = Output & WS.Name & " "
    Next WS
    MsgBox Output
    Set WS = Nothing
End Sub
Explanation:
- The variable WS is declared as a reference to a Worksheet object.
- The Worksheets collection of the current workbook is iterated through.
- Within the loop, the current worksheet is referred to by WS.
- The worksheet names are concatenated into a string that is then displayed in a message box.ob
Creating New Objects in Excel VBA
Many objects in VBA applications already exist within Excel—these are visible objects such as Range, Worksheet, and so forth. However, there are also helper objects that you create during the execution of your VBA program; these objects are essentially « invisible. » Examples include a connection to a database (see Section 9.8.2, “Example Database: Establishing a Connection”) or a collection object (see Section 6.6, “Collections”).
Such objects are created using the keyword New. At the same time or shortly thereafter, a reference to the newly created object is established.
Here is an example demonstrating both approaches:
Sub NewObjectExample()
    Dim C1 As New Collection
    Dim C2 As Collection
    Set C2 = New Collection
    Set C1 = Nothing
    Set C2 = Nothing
End Sub
Explanation:
- Using Dim C1 As New Collection creates a new, empty collection object immediately, and C1 is simultaneously set as a reference to this new collection.
- In contrast, Dim C2 As Collection declares C2 as a reference variable that can point to a collection object—but at this point, no actual collection exists.
- Only when you execute Set C2 = New Collection is a new, empty collection created, and C2 becomes a reference to it.
- Assigning Nothing to C1 and C2 releases the references to the objects. When there are no more references to a created object, it becomes inaccessible, and the system can reclaim the memory allocated to it.
Assigning Object Variables Hierarchically in Excel VBA
You can assign object variables step-by-step following the object hierarchy. This approach makes your code clearer and easier to maintain, especially when working with multiple objects located at different levels within the hierarchy.
Here is an example:
Sub HierarchicalObjectVariableAssignment()
    Dim WS As Worksheet
    Dim Rg1 As Range, Rg2 As Range
    Set WS = ThisWorkbook.Worksheets("Sheet1")
    Set Rg1 = WS.Range("C1:C2")
    Set Rg2 = WS.Range("D1:D2")
    Rg1.Value = 1.7
    Rg2.Value = 3.4
    Set Rg1 = Nothing
    Set Rg2 = Nothing
    Set WS = Nothing
End Sub
Explanation:
- First, the variable WS is assigned as a reference to the worksheet named « Sheet1 ».
- Then, the variables Rg1 and Rg2 are assigned as references to different ranges within that worksheet.
- This hierarchical assignment avoids repeatedly typing the full path and helps organize code logically.
- After modifying the range values, the object variables are set to Nothing to release the references.