Votre panier est actuellement vide !
Étiquette : macro_objects
Working with Object Variables in Excel VBA
You are already familiar with variables of basic data types such as Integer, Double, and others. Object variables, however, do not store numbers or text; instead, they hold references (pointers) to objects. These objects can be existing ones you want to refer to with a shorter or more convenient name, or they can be new objects you create yourself.
Here is an example:
Sub ObjectVariableExample()
    Dim Rg1 As Range
    Dim Rg2 As Range
    Set Rg1 = ThisWorkbook.Worksheets("Sheet1").Range("B1:B3")
    Set Rg2 = Rg1
    Rg1.Value = 18.2
    Rg1.NumberFormat = "0.000"
    Rg2.Font.Size = 24
    ApplyBorder Rg2
    Set Rg1 = Nothing
    Set Rg2 = Nothing
End Sub

Sub ApplyBorder(x As Range)
    x.Borders.Weight = xlThick
End Sub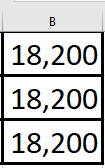
Explanation:
- The variables Rg1 and Rg2 are declared as references to objects of the Range type using the As Range syntax.
- Alternatively, they could be declared more generally as Object type (e.g., Dim Rg1 As Object), but declaring them with the specific type Range is clearer and allows for faster execution and better IntelliSense support.
- Assigning an object reference to a variable requires the Set keyword. Here, Rg1 is assigned a range object corresponding to the cell range « B1:B3 » on worksheet « Sheet1 ».
- Rg2 is then assigned the same reference as Rg1, so both variables point to the same range object.
- You can access and modify this range using either variable. In the example, the cell values, number format, and font size are changed.
- Object references can also be passed as parameters to procedures or functions. Here, the procedure ApplyBorder receives a Range parameter x and sets the border weight for the range.
- After finishing with the object variables, assigning Nothing to Rg1 and Rg2 releases their references, meaning they no longer point to any object.
Additional Notes:
- After declaring the variable Rg1 as a Range, the VBA editor provides IntelliSense: when you type Rg1. it shows a list of properties and methods available for the Range object. This feature is not available if you use an expression like Range(« B1:B3 »)..
- Pressing the F1 key opens the help documentation related to the selected property or method for the appropriate object type, providing quick access to detailed information.
Accessing Objects Using With in Excel VBA
The With statement in VBA allows you to execute a series of instructions on a single object efficiently. By establishing the reference to the object once, you can repeatedly apply multiple properties or methods to it without repeating the full object path. This is especially useful when dealing with long object names, making the code clearer and easier to read.
The basic structure is:
With Object
    [Statements]
End With
Here is an example:
Sub WithStatementExample()
    With ThisWorkbook.Worksheets("Sheet1").Range("A1:A3")
        .Value = 12.8
        .NumberFormat = "0.000"
        .Font.Size = 24
        .Borders.Weight = xlThick
    End With
End Sub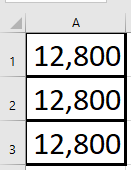
Explanation:
In this example, several properties of the range A1:A3 are changed within the With block. The value is set to 12.8, the number format is customized, the font size is enlarged, and the border thickness is set to a thick line.
Within the With block, each property or method reference begins with a dot (.), which clearly indicates that it belongs to the object specified after With. This shorthand avoids the need to repeat the full object reference in each line, improving both readability and performance.
Nested With Statements
You can also nest With statements to work with sub-objects or collections. To illustrate, the example from Section 2.4.19, “Sorting a Range with Multiple Keys”, has been rewritten as follows:
Sub NestedWithExample()
    ThisWorkbook.Worksheets("Sheet4").Activate
    With ActiveSheet.Sort
        With .SortFields
            .Clear
            .Add Range("A1:A5")
            .Add Range("B1:B5")
            .Add Range("C1:C5")
            .Add Range("D1:D5")
            .Add Range("E1:E5")
        End With
        .SetRange Range("A1:E6")
        .Apply
    End With
End Sub
Explanation:
- The outer With works with the Sort object of the active worksheet. This includes accessing the SortFields collection and calling methods like .SetRange and .Apply.
- The inner With operates on the SortFields collection itself, allowing you to call .Clear and .Add methods multiple times on this collection without repeating the full reference.
This nesting makes the code more concise and logically structured when working with complex object hierarchies.
Referencing Objects with Excel VBA
When accessing individual objects in VBA, it is best to do so as directly as possible—that is, without unnecessary intermediate steps. Unfortunately, many VBA applications follow a pattern like this:
- A workbook is activated.
- A worksheet is activated.
- A range is selected.
- Properties of the selected range are modified or methods are applied to it.
While this approach of activating and selecting is easy to understand, it tends to be slower and more prone to errors.
Here is an example illustrating this less efficient method:
Sub ActivateAndSelect()
    ThisWorkbook.Activate
    Worksheets("Sheet1").Activate
    Range("A7:A9").Select
    Selection.Interior.Color = vbYellow
End Sub
By referencing objects directly instead, you create applications that run faster and are easier to maintain. Here is an improved version using direct referencing:
Sub ReferenceDirectly()
    ThisWorkbook.Worksheets("Sheet1"). _
    Range("A10:A12").Interior.Color = vbYellow
End Sub
At first glance, this VBA code might seem more complex. However, it follows the object hierarchy logically: workbook, worksheet, cell range, property. Such statements can be longer, but they can be split across multiple lines for readability, as demonstrated above.
This method reduces unnecessary activation and selection steps, which improves performance and reduces the chance of runtime errors caused by unexpected selections or activations.
Object Browser in Excel VBA
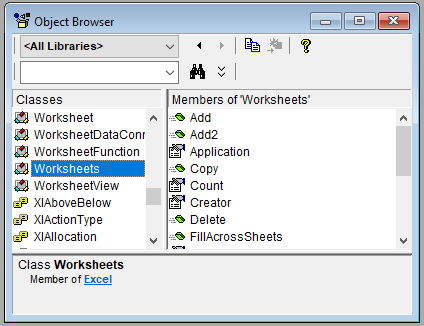
In the Visual Basic Editor (VBE), you can open the Object Browser by pressing the F2 key. This tool provides a comprehensive list of all available classes, along with their properties, methods, and events.
When you select a class—for example, WORKSHEETS as shown detailed list of that class’s properties, methods, and events appears on the right side of the window.
Additionally, further assistance is available through the Help menu in the VBE. By choosing the menu item Microsoft Visual Basic for Applications Help, you access Microsoft’s online documentation, which includes the VBA reference for Excel.
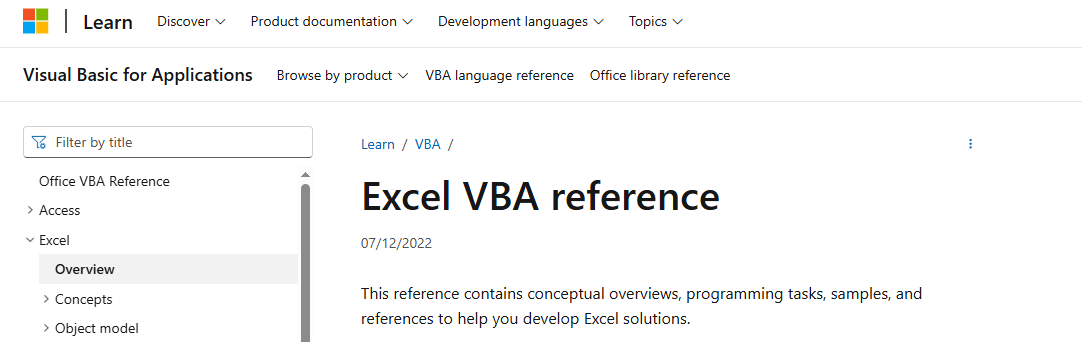
This reference is an invaluable resource for exploring VBA objects, understanding their members, and learning how to use them effectively in your projects.
Inserting Cells and Rows in Excel VBA
The following VBA procedure demonstrates how to insert cell ranges into a worksheet:

Sub ZelleEinfuegen()
    ThisWorkbook.Worksheets("Sheet1").Activate
    Range("A2:A3").Insert Shift:=xlShiftDown
    Range("6:7").Insert
End Sub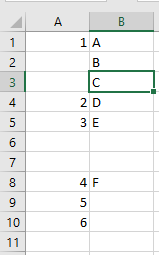
Detailed Explanation:
The Insert Method
The Insert method of the Range object is used to insert new cells, rows, or columns into a worksheet.
Optional Parameter: Shift
The Shift parameter determines how existing neighboring cells are adjusted to make room for the inserted cells.
- xlShiftDown: shifts existing cells downward
- xlShiftToRight: shifts existing cells to the right
If you omit the Shift parameter, Excel will determine the appropriate direction based on the shape of the selected range:
- If the range is taller than it is wide, Excel will shift cells down.
- If the range is wider than it is tall, Excel will shift cells to the right.
What This Procedure Does:
- Activates the worksheet named « Tabelle1 ».
- Inserts two new cells at range A2:A3, pushing the existing content downward (due to Shift:=xlShiftDown).
- Inserts two entire new rows at row positions 6 and 7 (Range(« 6:7 »).Insert). Since these are full rows, Excel automatically shifts the rows below downward. No Shift argument is needed in this case.
Additional Notes:
- If you want to insert entire rows instead of just cells, you can use:
- Range(« A2:A3 »).EntireRow.Insert
This inserts two complete rows above row 2 and row 3.
- Similarly, to insert entire columns:
- Range(« A2:A3 »).EntireColumn.Insert
This would insert a full new column before column A.
Summary
- Use Range(…).Insert to add new cells.
- Use Shift to control whether existing cells shift down or to the right.
- When inserting entire rows or columns, Excel automatically handles shifting; the Shift parameter is unnecessary.
Creating a New Workbook in Excel VBA
The following VBA procedure demonstrates how to create and open a new workbook in Excel. For verification, it displays the number of currently open workbooks both before and after the new workbook is created:
Sub NeueMappe()
    MsgBox "Before: " & Workbooks.Count & " workbook(s)"
    Workbooks.Add
    MsgBox "After: " & Workbooks.Count & " workbook(s)"
End Sub
Explanation:
This procedure makes use of the Add() method of the Workbooks object. When Workbooks.Add is called, Excel creates a new, blank workbook and immediately opens it. This new workbook also becomes the active workbook, meaning it is now the one in focus and ready for user interaction.
At the same time, the new workbook is added to the Workbooks collection. You can observe this by comparing the output of Workbooks.Count before and after the Add() method is executed: the count increases by one, confirming that a new workbook has been successfully created and included in the collection of currently open workbooks.
Object Hierarchy and Collections in Excel VBA
Object Hierarchy and Collections in Excel VBA
In Excel VBA, objects are organized in a hierarchical structure, where each object can contain sub-objects with their own properties, methods, and events. Understanding this hierarchy is essential for writing effective VBA code, as it determines how you reference and manipulate different elements in Excel.
The Object Hierarchy in Excel
- Application Object (Top-Level Object)
- Represents Excel itself, the root of the hierarchy.
- Properties:Controls global Excel settings (e.g., Version, Application.ScreenUpdating).
- Methods:Performs actions at the application level (e.g., Quit closes Excel).
Example:
MsgBox "You are using Excel version: " & Application.Version
- Workbooks Collection (Child of Application)
- Contains all open Excel files(each file is a Workbook object).
- Key Properties & Methods:
- Count→ Number of open workbooks.
- Add→ Creates a new workbook.
- Open(« C:\Files\Data.xlsx »)→ Opens an existing workbook.
Example:
Dim wb As Workbook
Set wb = Workbooks.Add  ' Creates a new workbook
wb.SaveAs "C:\Reports\NewData.xlsx"
Worksheets Collection (Child of Workbook)
- Contains all sheets(worksheets, chart sheets) in a workbook.
- Key Properties & Methods:
- Count→ Number of sheets.
- Add→ Inserts a new sheet.
- Worksheets(« Sheet1 »).Name = « Data »→ Renames a sheet.
Example:
Worksheets.Add After:=Worksheets(Worksheets.Count)  ' Adds a sheet at the end
Worksheets("Sheet1").Range("A1").Value = "Hello"
Range Object (Child of Worksheet)
- Represents cells or cell ranges(e.g., single cells, columns, tables).
- Key Properties & Methods:
- Range(« A1 »).Value→ Gets/sets a cell’s value.
- Range(« A1:B10 »).Copy→ Copies a range.
- Range(« A1 »).EntireColumn.AutoFit→ Adjusts column width.
Example:
Range("A1:D10").Font.Bold = True ' Makes text bold in the range Understanding Collections- Collections are groups of similar objects(e.g., Workbooks, Worksheets).
- Identified by plural names(ending with « s »).
- Accessed via:
- Index:Worksheets(1) (first sheet).
- Name:Worksheets(« Sheet1 »).
Example:
For Each ws In Worksheets  ' Loops through all sheets
    ws.Range("A1").Value = "Updated"
Next ws
Practical Hierarchy Example
To reference cell A1 in Sheet1 of the active workbook:
Application.Workbooks("MyWorkbook.xlsx").Worksheets("Sheet1").Range("A1").Value = 100- Top-down navigation:Application → Workbook → Worksheet → Range.
Key Take aways
- Objects are nested (e.g., Excel → Workbook → Worksheet → Range).
- Collections manage groups of objects (Workbooks, Worksheets).
- Reference objects explicitly to avoid errors (e.g., specify workbook/sheet names).
This hierarchical structure is fundamental for controlling Excel programmatically. Mastering it allows you to automate tasks efficiently.
Object-Oriented Nature of VBA
VBA (Visual Basic for Applications) is an object-oriented programming language, which means it operates by manipulating objects. In Excel VBA, almost everything you work with – from the entire workbook down to individual cells – is represented as an object. These objects have three fundamental characteristics:
- Properties (Attributes)
Properties define the characteristics or appearance of an object. They represent the « state » of an object and can typically be both read and modified.
Example:
A Worksheet object has a Name property that stores the sheet’s label (e.g., « Sheet1 »). You can:- Read this property: currentName = ActiveSheet.Name
- Modify it: Name = « SalesData »
Other common properties include:
- Value: The content of a cell
- Visible: Whether a sheet is visible or hidden
- Saved: Whether changes have been saved
- Methods
Methods represent the actions that an object can perform – essentially what the object « can do. »
Example:
The Worksheet object has a Copy method that duplicates the sheet:Worksheets("Sheet1").Copy After:=Worksheets("Sheet2")Other important methods include:
- Select: Highlights specific cells
- Save: Saves the workbook
- Delete: Removes a sheet
- Events
Events are specific actions that occur to or within an object, which can trigger automated responses through VBA code.
Example:
The Worksheet_Activate() event occurs when a user selects a particular sheet. You can write code that automatically executes when this happens:Private Sub Worksheet_Activate() MsgBox "You've activated the Sales Data sheet!" End Sub
Other common events include:
- Workbook_Open(): Triggers when a workbook is opened
- Worksheet_Change(): Occurs when cells on a sheet are modified
- BeforeClose: Happens just before a workbook closes
Practical Applications
This chapter focuses on introducing VBA’s capabilities without delving into more complex programming concepts like variables, conditional statements, or loops. These foundational elements of objects, properties, methods, and events will enable you to:
- Automate repetitive tasks
- Create interactive spreadsheets
- Build custom functionality in Excel
The subsequent chapter (Chapter 3, « Fundamentals of VBA Programming ») will cover those more advanced programming elements that significantly enhance Excel automation capabilities.
Key Takeaways
- Objects are the building blocks of VBA (Workbooks, Worksheets, Ranges)
- Properties describe objects (Name, Value, Color)
- Methods are actions objects can perform (Copy, Save, Delete)
- Events trigger automated responses to user actions