Votre panier est actuellement vide !
Catégorie : Excel VBA Course
Dialogfelder Running the First Example in Excel VBA
To test the dialog box within the Visual Basic Editor (VBE), simply press the F5 key. This works whether you are in the Code view or the Object view of the UserForm.
If you want to launch the dialog box from a worksheet or elsewhere in the workbook, you will need an additional procedure. This procedure should be stored in a standard code module:
Sub ShowDialog()
    frmFirst.Show
    MsgBox "Dialog box closed"
End Sub
Explanation:
The method .Show() loads the dialog box into memory and displays it to the user.For example, you can link the dialog box display to the Workbook Open event, so it appears automatically when the workbook is opened:
Private Sub Workbook_Open()
    frmFirst.Show
End Sub
Important Notes
This is a modal dialog box, meaning that no other actions in Excel can be performed while the dialog is open. Additionally, any further VBA code following the .Show method in the calling procedure (e.g., in ShowDialog) will only execute once the dialog box has been closed.
This behavior is advantageous because it guides the user through the application in a controlled manner.
It is also possible, though less commonly used, to display a dialog box as modeless by specifying the optional parameter vbModeless when calling .Show. In this case, the user can still interact with the worksheet even while the dialog box is open. For instance, dialog boxes in Word or Excel are sometimes called this way.
Using a modal dialog box forces the user to provide or select certain data first before interacting further with the workbook sheets.
Exporting and Importing
A UserForm module containing a dialog box can be exported and imported just like a standard code module.
The export/import process is explained in detail in section 5.6, « Exporting and Importing Modules. » The main difference is that two files are generated for the UserForm module: one with the extension .frm and another with .frx, whereas a standard code module exports as a single .bas file.

Dialogfelder First Example: Code in Excel VBA
To create an event procedure, simply double-click the corresponding command button in the UserForm designer. This action opens a blank event procedure whose name is composed of the control’s name and the event it handles. The VBA code for the Click event of that specific command button will be written inside this procedure.
For the command button labeled HALLO, the event procedure is named cmdHallo_Click. This empty procedure is then filled with VBA code as follows:
Private Sub cmdHello_Click()
    MsgBox "Hello"
End Sub
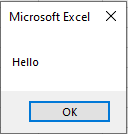
An event procedure can also be created in a manner similar to event procedures for a workbook or worksheet:
- In the Project Explorer, select the dialog box (i.e., frmFirst).
- From the View menu, select Code.
- In the dropdown list above the code window on the left, select the control (command button) for which you want to write an event.
- From the dropdown list on the right, select the desired event (such as Click).
You can switch between the Code view and the Object view anytime using the View menu.
The event procedure for the ENDE command button is:
Private Sub cmdEnde_Click()
    Unload Me
End Sub
Explanation:
The statement Unload unloads an object from memory. As a result, all local or module-level variables associated with the UserForm become unavailable.The keyword Me refers to the current object—in this case, the UserForm itself.
Selecting Font Formatting for a Cell Range in Excel VBA
Similar to selecting a background pattern, you can allow the user to choose font formatting for a selected range of cells.
Example:
Sub SelectFontFormatting()
    Dim success As Boolean
    ' Select the cell range A1:C3 on worksheet "Sheet1"
    ThisWorkbook.Worksheets("Sheet1").Range("A1:C3").Select
    ' Show the built-in Excel "Font" dialog for font formatting
    success = Application.Dialogs(xlDialogFontProperties).Show
    ' If the user cancels without selecting formatting, show a message
    If Not success Then MsgBox "No formatting was selected"
End Sub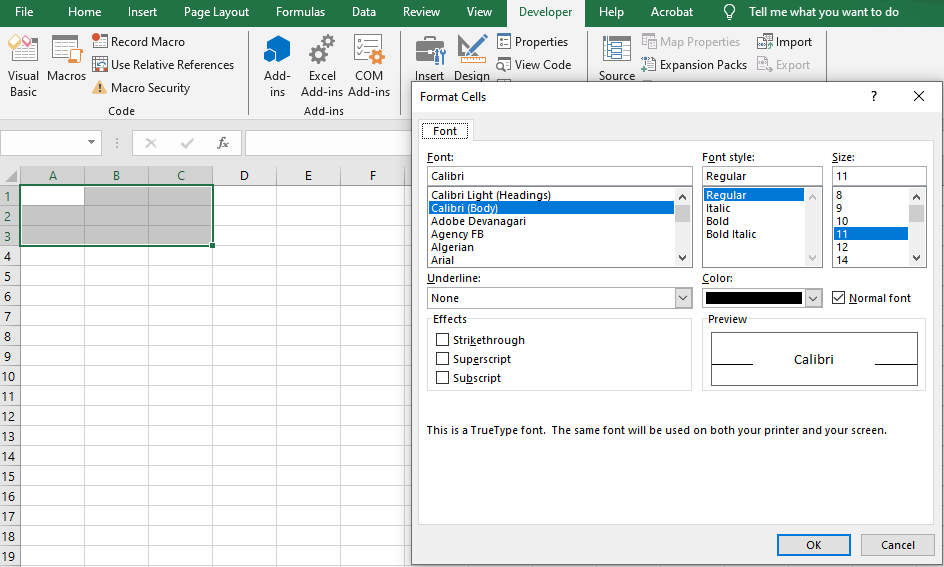
Explanation:
- The constant xlDialogFontProperties opens Excel’s standard Format Cells dialog directly on the Font tab.
- If the user clicks OK, the selected cells are updated with the chosen font properties such as font type, size, style, color, and effects.
- If the user cancels the dialog, the variable success is False, and a message box informs the user that no changes were applied.
Selecting a Background Pattern for a Cell Range in Excel VBA
After selecting a range of cells—either programmatically or by the user—you can prompt the user to choose a background pattern or fill color for that range.
Example:
Sub SelectBackgroundPattern()
    Dim success As Boolean
    ' Select the cell range A1:C3 on the worksheet "Sheet1"
    ThisWorkbook.Worksheets("Sheet1").Range("A1:C3").Select
    ' Show the built-in Excel "Patterns" dialog for fill formatting
    success = Application.Dialogs(xlDialogPatterns).Show
    ' If the user cancels without selecting a pattern, show a message
    If Not success Then MsgBox "No pattern was selected"
End Sub
Explanation:
- The constant xlDialogPatterns opens Excel’s built-in dialog box for cell fill patterns and colors, found under the Fill tab in the Format Cells dialog.
- If the user clicks OK, the selected cells are formatted with the chosen background pattern or fill color.
- If the user cancels the dialog, the variable success is False and a message box informs the user that no pattern was applied.
Save File As Dialog in Excel VBA
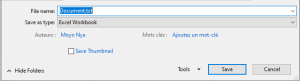
When displaying a « Save As » dialog, you can preset a default filename for the user.
Example:
Sub SaveFileAsDialog()
    Dim success As Boolean
    Workbooks.Add ' Create a new workbook
    ' Show the built-in Excel "Save As" dialog with a preset filename
    success = Application.Dialogs(xlDialogSaveAs).Show(arg1:="C:\Users\POPOLY\Desktop\Doc\Document.txt")
    ' If the user cancels the dialog, show a message box
    If Not success Then MsgBox "Save operation was cancelled"
End Sub
Explanation:
- The constant xlDialogSaveAs calls the built-in Excel « Save As » dialog box.
- The argument « C:\Users\POPOLY\Desktop\Doc\Document.txt » sets the default filename shown in the dialog.
- If the user clicks Save, the new workbook is saved with the given name.
- If the user cancels the dialog, the variable success is set to False and a message box informs the user that the save was cancelled.
Opening a File in Excel VBA
When displaying a file-open dialog, you can preset a default filename or even use wildcards as a filter.
Example:
Sub OpenFileDialog()
    Dim success As Boolean
    ' Show the built-in Excel "Open File" dialog with a preset filter
    success = Application.Dialogs(xlDialogOpen).Show(arg1:="C:\Users\POPOLY\Desktop\Doc\Document.txt")
    ' If the user cancels the dialog, show a message box
    If Not success Then MsgBox "No file was opened"
End Sub

Explanation:
- The constant xlDialogOpen specifies the built-in Excel dialog for opening files.
- The argument « C:\Users\POPOLY\Desktop\Doc\Document.txt » is a filter pattern: it shows only files whose names start with the letter « M » and have the .xlsx extension.
- The user can override this filter and select any file.
- After clicking Open, the selected file(s) are opened in Excel.
- If the user clicks Cancel, the variable success is set to False, and a message box notifies the user that no file was opened.
Exporting Files in a Directory Hierarchy in Excel VBA
This section describes how to export all Word documents (.docx files) and Excel workbooks (.xlsx files) from the subdirectory Export and all its subdirectories into PDF files. The resulting PDFs will be saved in the same directories as their source files.
Key Concepts:
- All entries (files and folders) within a directory are traversed using the Dir() function.
- When an entry is a Word document, it is exported to PDF using Word’s ExportAsFixedFormat() method.
- When an entry is an Excel workbook, it is exported to PDF using Excel’s ExportAsFixedFormat() method.
- If the entry is a subdirectory, its name is added to a Collection object for later processing.
- After completing the traversal of the current directory, the procedure recursively processes each stored subdirectory in the collection.
Important Note on Dir() and Recursion:
Dir() maintains internal state regarding the current search pattern and directory. It cannot handle multiple concurrent search contexts, which makes recursive calls that rely on Dir() within a directory traversal problematic.
To work around this, the recursive calls for subdirectories are performed after finishing the current directory traversal, iterating through the stored collection of subdirectories.
Entry Procedure: HierarchieStart()
This procedure initializes the Word and Excel application objects, sets the starting path, and calls the recursive procedure to begin traversal.
Sub HierarchieStart()
    Dim path As String
    Dim appWord As Word.Application
    Dim appExcel As Excel.Application
    path = ThisWorkbook.Path & "\Export"
    Set appWord = CreateObject("Word.Application")
    Set appExcel = CreateObject("Excel.Application")
    HierarchieUnter path, appWord, appExcel
    appWord.Quit
    appExcel.Quit
    Set appWord = Nothing
    Set appExcel = Nothing
    MsgBox "Finished"
End Sub
Recursive Procedure: HierarchieUnter()
This procedure traverses a given directory, exports all Word and Excel files it finds, and collects subdirectories to recurse into afterward.
Sub HierarchySub(path As String, _
                 appWord As Word.Application, _
                 appExcel As Excel.Application)
    Dim directoryList As New Collection
    Dim directory As Variant
    Dim entry As String
    Dim fullEntry As String
    Dim nameParts() As String
    Dim length As Integer
    Dim document As Word.Document
    Dim workbook As Excel.Workbook
    Dim pdfFileName As String
    entry = Dir(path & "\*", vbDirectory) ' Get first entry including directories
    Do While entry <> ""
        fullEntry = path & "\" & entry
        nameParts = Split(entry, ".")
        length = UBound(nameParts) - LBound(nameParts) + 1
        ' If file with exactly two parts and extension .docx or .xlsx
        If length = 2 Then
            If nameParts(1) = "docx" Then
                Set document = appWord.Documents.Add(fullEntry)
                pdfFileName = path & "\" & nameParts(0) & ".pdf"
                document.ExportAsFixedFormat _
                    OutputFileName:=pdfFileName, _
                    ExportFormat:=wdExportFormatPDF
                document.Close SaveChanges:=wdDoNotSaveChanges
                Set document = Nothing
            ElseIf nameParts(1) = "xlsx" Then
                Set workbook = appExcel.Workbooks.Add(fullEntry)
                pdfFileName = path & "\" & nameParts(0) & ".pdf"
                workbook.ExportAsFixedFormat _
                    Type:=xlTypePDF, Filename:=pdfFileName
                workbook.Close SaveChanges:=False
                Set workbook = Nothing
            End If
        End If
        ' Ignore the current and parent directory entries "." and ".."
        If entry <> "." And entry <> ".." Then
            ' Check if entry is a directory
            If (GetAttr(fullEntry) And vbDirectory) > 0 Then
                directoryList.Add fullEntry
            End If
        End If
        entry = Dir() ' Get next entry
    Loop
    ' Recurse into collected subdirectories
    For Each directory In directoryList
        HierarchySub directory, appWord, appExcel
    Next directory
End Sub
Explanation:
- The initial call to Dir() with the attribute vbDirectory retrieves all entries (files and folders).
- Each entry’s full path is checked.
- Using Split(), the filename is split into name and extension parts.
- Files with extensions .docx or .xlsx are exported accordingly to PDF.
- Entries representing current . and parent .. directories are skipped.
- For all other entries, the attribute is checked to determine if it is a directory; if yes, it is added to a Collection.
- After completing the directory traversal, the procedure recursively calls itself for each subdirectory stored in the Collection.
This approach efficiently walks through all folders and subfolders exporting Word and Excel files to PDFs, keeping each PDF in the corresponding directory.
Exporting All Excel Files in a Directory to PDF in Excel VBA
This section exports all Excel files with the .xlsx extension from the Export subdirectory into PDF files.
Code example:
Sub ExportExcelFilesToPDFInFolder()
    Dim appExcel As Excel.Application
    Dim workbook As Excel.Workbook
    Dim folderPath As String
    Dim excelFileName As String
    Dim pdfFileName As String
    Dim nameParts() As String
    Set appExcel = CreateObject("Excel.Application")
    folderPath = ThisWorkbook.Path & "\Export"
    ' Get the first .xlsx file in the folder
    excelFileName = Dir(folderPath & "\*.xlsx")
    Do While excelFileName <> ""
        ' Open the Excel workbook
        Set workbook = appExcel.Workbooks.Add(folderPath & "\" & excelFileName)
        ' Split filename into name and extension
        nameParts = Split(excelFileName, ".")
        ' Build PDF filename with same base name but .pdf extension
        pdfFileName = folderPath & "\" & nameParts(0) & ".pdf"
        ' Export the workbook as PDF
        workbook.ExportAsFixedFormat _
            Type:=xlTypePDF, Filename:=pdfFileName
        ' Close workbook without saving changes
        workbook.Close SaveChanges:=False
        ' Get the next .xlsx file matching the pattern
        excelFileName = Dir
    Loop
    ' Quit Excel application and clean up
    appExcel.Quit
    Set workbook = Nothing
    Set appExcel = Nothing
End Sub
Explanation:
- The process uses the Dir() function, a Do While loop, and the Split() function.
- The Dir() function is first called with the search pattern *.xlsx to get the first Excel file.
- The loop opens each Excel file in the folder, splits its filename to separate the base name and extension, and builds the output PDF filename by replacing the extension with .pdf.
- Each workbook is then exported as a PDF using ExportAsFixedFormat.
- After exporting, the workbook is closed without saving any changes.
- The loop continues by calling Dir() without parameters to fetch subsequent .xlsx files until none remain.
- Finally, the Excel application is quit and object references are cleaned up.
Exporting an Excel File in Excel VBA
Similar to Word 2010, since Excel 2010 the Workbook object provides the method ExportAsFixedFormat(). This method allows exporting an Excel workbook as a PDF file or as an XPS file.
Example:
Sub ExportExcelToPDF()
    Dim appExcel As Excel.Application
    Dim workbook As Excel.Workbook
    Dim folderPath As String
    Dim pdfFileName As String
    Set appExcel = CreateObject("Excel.Application")
    folderPath = ThisWorkbook.Path & "\Export"
    ' Open the Excel workbook from the Export folder
    Set workbook = appExcel.Workbooks.Add(folderPath & "\MappeTest01.xlsx")
    ' Define the PDF filename to be created
    pdfFileName = folderPath & "\MappeTest01.pdf"
    ' Export the workbook as PDF
    workbook.ExportAsFixedFormat _
        Type:=xlTypePDF, Filename:=pdfFileName
    ' Close workbook without saving changes
    workbook.Close SaveChanges:=False
    ' Quit Excel application and clean up
    appExcel.Quit
    Set workbook = Nothing
    Set appExcel = Nothing
End Sub
Explanation:
- The Excel file is accessed similarly to Word by using the CreateObject() method, which returns a reference to an Excel.Application object.
- The parameter names differ slightly compared to Word:
- The filename of the output file is passed via Filename (note capitalization).
- The output format is specified with the Type parameter, which can be either xlTypePDF or xlTypeXPS.
- When closing the workbook with the Close() method, passing False for SaveChanges prevents saving any changes to the original file.
- The Excel application is then terminated with Quit().
Exporting Word Documents to PDF in a Directory with Excel VBA
This function allows you to search for multiple files within a directory that match a certain pattern.
Using this function, the following example exports all Word files with the .docx extension from the subdirectory Export into PDF files:
Code example:
Sub ExportWordFilesToPDFInFolder()
    Dim appWord As Word.Application
    Dim document As Word.Document
    Dim folderPath As String
    Dim wordFileName As String
    Dim pdfFileName As String
    Dim nameParts() As String
    Set appWord = CreateObject("Word.Application")
    folderPath = ThisWorkbook.Path & "\Export"
    ' Get the first .docx file in the folder
    wordFileName = Dir(folderPath & "\*.docx")
    Do While wordFileName <> ""
        ' Open the Word document
        Set document = appWord.Documents.Add(folderPath & "\" & wordFileName)
        ' Split filename into name and extension
        nameParts = Split(wordFileName, ".")
        ' Build PDF filename with same base name but .pdf extension
        pdfFileName = folderPath & "\" & nameParts(0) & ".pdf"
        ' Export the document as PDF
        document.ExportAsFixedFormat _
            OutputFileName:=pdfFileName, _
            ExportFormat:=wdExportFormatPDF
        ' Close document without saving changes
        document.Close SaveChanges:=wdDoNotSaveChanges
        ' Get the next .docx file matching the pattern
        wordFileName = Dir
    Loop
    ' Quit Word application and clean up
    appWord.Quit
    Set document = Nothing
    Set appWord = Nothing
End Sub
Explanation:
- The variable wordFileName initially stores the name of the first .docx file found in the Export folder under the directory of the Excel workbook running this macro.
- If a matching file is found, the Do While loop begins.
- Calling Dir() again without parameters at the end of the loop fetches the next .docx file that matches the pattern.
- The loop ends when no more matching files are found (Dir() returns an empty string).
- Inside the loop, the full filename is split into name and extension parts using the Split() function.
- The PDF filename is then created by replacing the .docx extension with .pdf.
- Each Word document is opened, exported to PDF, and closed without saving changes.