Votre panier est actuellement vide !
Catégorie : Excel VBA Course
Assigning Object Variables Hierarchically in Excel VBA
You can assign object variables step-by-step following the object hierarchy. This approach makes your code clearer and easier to maintain, especially when working with multiple objects located at different levels within the hierarchy.
Here is an example:
Sub HierarchicalObjectVariableAssignment()
    Dim WS As Worksheet
    Dim Rg1 As Range, Rg2 As Range
    Set WS = ThisWorkbook.Worksheets("Sheet1")
    Set Rg1 = WS.Range("C1:C2")
    Set Rg2 = WS.Range("D1:D2")
    Rg1.Value = 1.7
    Rg2.Value = 3.4
    Set Rg1 = Nothing
    Set Rg2 = Nothing
    Set WS = Nothing
End Sub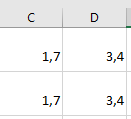
Explanation:
- First, the variable WS is assigned as a reference to the worksheet named « Sheet1 ».
- Then, the variables Rg1 and Rg2 are assigned as references to different ranges within that worksheet.
- This hierarchical assignment avoids repeatedly typing the full path and helps organize code logically.
- After modifying the range values, the object variables are set to Nothing to release the references.
Working with Object Variables in Excel VBA
You are already familiar with variables of basic data types such as Integer, Double, and others. Object variables, however, do not store numbers or text; instead, they hold references (pointers) to objects. These objects can be existing ones you want to refer to with a shorter or more convenient name, or they can be new objects you create yourself.
Here is an example:
Sub ObjectVariableExample()
    Dim Rg1 As Range
    Dim Rg2 As Range
    Set Rg1 = ThisWorkbook.Worksheets("Sheet1").Range("B1:B3")
    Set Rg2 = Rg1
    Rg1.Value = 18.2
    Rg1.NumberFormat = "0.000"
    Rg2.Font.Size = 24
    ApplyBorder Rg2
    Set Rg1 = Nothing
    Set Rg2 = Nothing
End Sub

Sub ApplyBorder(x As Range)
    x.Borders.Weight = xlThick
End Sub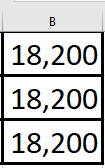
Explanation:
- The variables Rg1 and Rg2 are declared as references to objects of the Range type using the As Range syntax.
- Alternatively, they could be declared more generally as Object type (e.g., Dim Rg1 As Object), but declaring them with the specific type Range is clearer and allows for faster execution and better IntelliSense support.
- Assigning an object reference to a variable requires the Set keyword. Here, Rg1 is assigned a range object corresponding to the cell range « B1:B3 » on worksheet « Sheet1 ».
- Rg2 is then assigned the same reference as Rg1, so both variables point to the same range object.
- You can access and modify this range using either variable. In the example, the cell values, number format, and font size are changed.
- Object references can also be passed as parameters to procedures or functions. Here, the procedure ApplyBorder receives a Range parameter x and sets the border weight for the range.
- After finishing with the object variables, assigning Nothing to Rg1 and Rg2 releases their references, meaning they no longer point to any object.
Additional Notes:
- After declaring the variable Rg1 as a Range, the VBA editor provides IntelliSense: when you type Rg1. it shows a list of properties and methods available for the Range object. This feature is not available if you use an expression like Range(« B1:B3 »)..
- Pressing the F1 key opens the help documentation related to the selected property or method for the appropriate object type, providing quick access to detailed information.
Accessing Objects Using With in Excel VBA
The With statement in VBA allows you to execute a series of instructions on a single object efficiently. By establishing the reference to the object once, you can repeatedly apply multiple properties or methods to it without repeating the full object path. This is especially useful when dealing with long object names, making the code clearer and easier to read.
The basic structure is:
With Object
    [Statements]
End With
Here is an example:
Sub WithStatementExample()
    With ThisWorkbook.Worksheets("Sheet1").Range("A1:A3")
        .Value = 12.8
        .NumberFormat = "0.000"
        .Font.Size = 24
        .Borders.Weight = xlThick
    End With
End Sub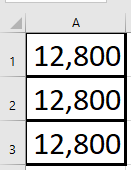
Explanation:
In this example, several properties of the range A1:A3 are changed within the With block. The value is set to 12.8, the number format is customized, the font size is enlarged, and the border thickness is set to a thick line.
Within the With block, each property or method reference begins with a dot (.), which clearly indicates that it belongs to the object specified after With. This shorthand avoids the need to repeat the full object reference in each line, improving both readability and performance.
Nested With Statements
You can also nest With statements to work with sub-objects or collections. To illustrate, the example from Section 2.4.19, “Sorting a Range with Multiple Keys”, has been rewritten as follows:
Sub NestedWithExample()
    ThisWorkbook.Worksheets("Sheet4").Activate
    With ActiveSheet.Sort
        With .SortFields
            .Clear
            .Add Range("A1:A5")
            .Add Range("B1:B5")
            .Add Range("C1:C5")
            .Add Range("D1:D5")
            .Add Range("E1:E5")
        End With
        .SetRange Range("A1:E6")
        .Apply
    End With
End Sub
Explanation:
- The outer With works with the Sort object of the active worksheet. This includes accessing the SortFields collection and calling methods like .SetRange and .Apply.
- The inner With operates on the SortFields collection itself, allowing you to call .Clear and .Add methods multiple times on this collection without repeating the full reference.
This nesting makes the code more concise and logically structured when working with complex object hierarchies.
Referencing Objects with Excel VBA
When accessing individual objects in VBA, it is best to do so as directly as possible—that is, without unnecessary intermediate steps. Unfortunately, many VBA applications follow a pattern like this:
- A workbook is activated.
- A worksheet is activated.
- A range is selected.
- Properties of the selected range are modified or methods are applied to it.
While this approach of activating and selecting is easy to understand, it tends to be slower and more prone to errors.
Here is an example illustrating this less efficient method:
Sub ActivateAndSelect()
    ThisWorkbook.Activate
    Worksheets("Sheet1").Activate
    Range("A7:A9").Select
    Selection.Interior.Color = vbYellow
End Sub
By referencing objects directly instead, you create applications that run faster and are easier to maintain. Here is an improved version using direct referencing:
Sub ReferenceDirectly()
    ThisWorkbook.Worksheets("Sheet1"). _
    Range("A10:A12").Interior.Color = vbYellow
End Sub
At first glance, this VBA code might seem more complex. However, it follows the object hierarchy logically: workbook, worksheet, cell range, property. Such statements can be longer, but they can be split across multiple lines for readability, as demonstrated above.
This method reduces unnecessary activation and selection steps, which improves performance and reduces the chance of runtime errors caused by unexpected selections or activations.
Object Browser in Excel VBA
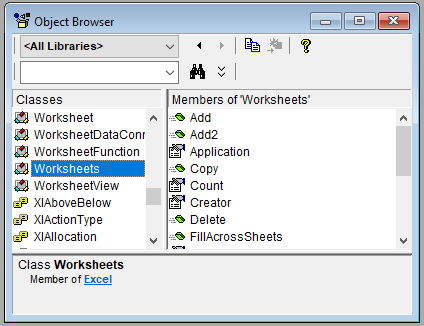
In the Visual Basic Editor (VBE), you can open the Object Browser by pressing the F2 key. This tool provides a comprehensive list of all available classes, along with their properties, methods, and events.
When you select a class—for example, WORKSHEETS as shown detailed list of that class’s properties, methods, and events appears on the right side of the window.
Additionally, further assistance is available through the Help menu in the VBE. By choosing the menu item Microsoft Visual Basic for Applications Help, you access Microsoft’s online documentation, which includes the VBA reference for Excel.
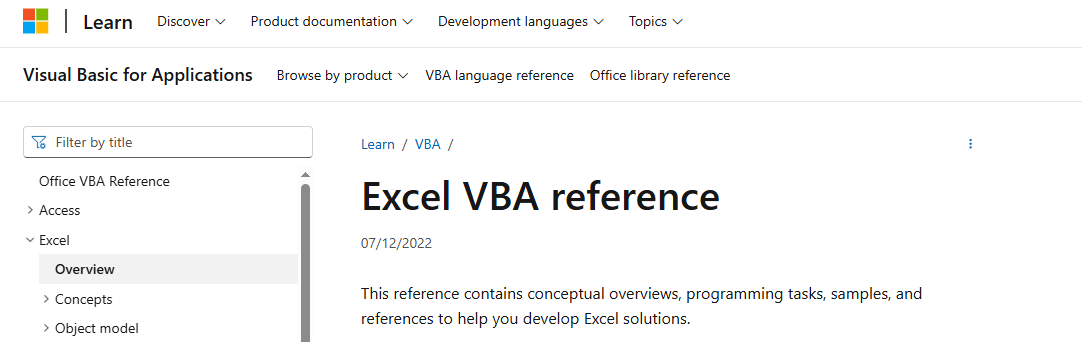
This reference is an invaluable resource for exploring VBA objects, understanding their members, and learning how to use them effectively in your projects.
Importing a Module with Excel VBA
First, in the VBA Project Explorer, select the workbook into which you want to import the module.
Then, from the File menu, choose the Import File option. This action will open the Import File dialog box. Alternatively, you can access this dialog by right-clicking on the target workbook within the Project Explorer and selecting Import File from the context menu.

In the dialog, navigate to the folder containing the module you wish to import. Select the module file to import it into the chosen workbook.
You can identify standard code modules by their .bas file extension, and UserForm modules by their .frm extension.
Exporting a Module with Excel VBA
In the VBA Project Explorer, first select the module you wish to export. This can be any module type—either a standard code module or a UserForm module.
Next, go to the File menu and choose the Export File option. This action will open the Export File dialog box. Alternatively, you can access this dialog by right-clicking on the module within the Project Explorer and selecting Export File from the context menu.
In the dialog, select the desired destination folder where you want to save the exported file. For standard code modules, the file will be saved with the extension .bas. For UserForm modules, the exported file will have the extension .frm.

When exporting a UserForm module, an additional file with the .frx extension is automatically saved in the same directory. This .frx file contains associated binary data such as images and control information necessary for the UserForm.
If you wish to delete a module, use the Remove option in the same File menu. To prevent accidental deletion, VBA will prompt you to ask if you want to export the module first. If you agree, the Export File dialog box will open, allowing you to save a backup before the module is removed from the project.
Code in Another File with Excel VBA
Below is an example illustrating how to work with procedures and functions located in a different Excel file (workbook). For this to work, the other workbook must be open in Excel.
First, the following code is located in Module1 of the current workbook:
Sub ModularOtherFile()
    ' Open the other workbook located in the same folder as the current workbook
    Workbooks.Open ThisWorkbook.Path & "\Mappe5Mod.xlsm"
    ' Call a procedure in the other workbook, specifying module and parameters
    Application.Run "Mappe5Mod.xlsm!Modul1.Summe5", 3, 5
    ' Call a function in the other workbook and display the returned result
    MsgBox "Summe 6: " & Application.Run("Mappe5Mod.xlsm!Modul1.Summe6", 3, 5)
    ' Call a procedure in the class module of the other workbook
    Application.Run "Mappe5Mod.xlsm!Tabelle1.Summe7", 3, 5
    ' Call a function in the class module of the other workbook and display the result
    MsgBox "Summe 8: " & Application.Run("Mappe5Mod.xlsm!Tabelle1.Summe8", 3, 5)
    ' Close the other workbook after execution
    Workbooks("Mappe5Mod.xlsm").Close
End Sub
In the other workbook named Mappe5Mod.xlsm, within Module1, the following procedure and function are defined:
Sub Summe5(a As Integer, b As Integer)
    MsgBox "Summe 5: " & (a + b)
End Sub

Function Summe6(a As Integer, b As Integer) As Integer
    Summe6 = a + b
End Function
Additionally, in the class module associated with the worksheet object Tabelle1 of Mappe5Mod.xlsm, the following procedure and function are defined:
Sub Summe7(a As Integer, b As Integer)
    MsgBox "Summe 7: " & (a + b)
End Sub

Function Summe8(a As Integer, b As Integer) As Integer
    Summe8 = a + b
End Function
Explanation:
Procedures and functions located in code modules of other workbooks can only be called if that workbook is open in Excel. Therefore, the example code first opens the workbook, executes the calls, and finally closes it.
If the workbook is already open, this will not cause any issues, assuming the code in the other workbook has not been modified during execution.
In this example, it is assumed that the other workbook is located in the same directory as the current one. To facilitate this, the path of the current workbook (ThisWorkbook.Path) is used to build the full file path.
To invoke procedures or functions in another workbook, the Application.Run() method is used. It requires a string as its first argument, which must follow this format:
« <WorkbookName>!<ModuleName>.<ProcedureOrFunctionName> »
Additional parameters (if any) follow after the string.
For example, calling a procedure looks like this:
Application.Run « <WorkbookName>!<ModuleName>.<ProcedureName> », Parameter1, Parameter2, …
Calling a function looks like this:
Result = Application.Run(« <WorkbookName>!<ModuleName>.<FunctionName> », Parameter1, Parameter2, …)
One important limitation to note: Functions defined inside class modules of another workbook, such as Summe8(), do not return values when called via Application.Run(). This is a restriction of the method and how VBA manages class module members across workbooks.
Code Within the Same File with Excel VBA
First, let’s consider an example demonstrating how procedures and functions can be defined and used within the same VBA project file.
The following code is located in the standard code module named Module1:
Sub ModularSameFile()
    ' Calling procedure from another standard module
    Summe1 3, 5
    MsgBox "Sum 2: " & Summe2(3, 5)
    ' Calling procedure and function from a class module associated with the worksheet object "Sheet1"
    Sheet1.Summe3 3, 5
    MsgBox "Sum 4: " & Sheet1.Summe4(3, 5)
End Sub
Next, in another standard code module named Module2, we have the following procedure and function:
Sub Summe1(a As Integer, b As Integer)
    MsgBox "Summe 1: " & (a + b)
End Sub

Function Summe2(a As Integer, b As Integer) As Integer
    Summe2 = a + b
End Function
Finally, within the class module associated with the worksheet object named Tabelle1, the following procedure and function are defined:
Sub Summe3(a As Integer, b As Integer)
    MsgBox "Summe 3: " & (a + b)
End Sub

Function Summe4(a As Integer, b As Integer) As Integer
    Summe4 = a + b
End Function
Explanation:
By default, procedures and functions defined in standard code modules have Public visibility, unless explicitly declared as Private Sub or Private Function. This means that the procedure Summe1() and the function Summe2() defined in Module2 can be directly called from anywhere within the VBA project, including from Module1 as shown in ModularGleicheDatei().
In contrast, procedures and functions within class modules (such as the one tied to the worksheet object Sheet1) have Private visibility by default. Consequently, the procedure Summe3() and the function Summe4() defined in the class module cannot be called directly by their name alone. Instead, you must prefix the call with the class module’s object name—in this case, Sheet1.—to access them. For example, you call Sheet1.Summe3 and Sheet1.Summe4 to invoke these members.
This distinction is important because it controls the scope and accessibility of code elements, ensuring encapsulation when working with object-oriented structures like class modules, while allowing more open access in standard modules.
User-Defined Data Type (UDT) with Excel VBA
A user-defined data type lets you combine related data of different types into a single structure, clarifying their thematic connection. It’s similar to a struct in other programming languages.
Key Features
- Components of a UDT can themselves be arrays.
- You can create variables and arrays of your new type.
- Variables of the UDT can be passed as parameters to procedures or functions.
- UDTs are declared at the module level (outside procedures), typically at the top, right under Option Explicit.
Example
Option Explicit
Type Person
    Name As String
    PNummer As Integer
    Telefon() As String        ' Dynamic array of phone numbers
    Telefax(1 To 2) As String ' Fixed array with 2 elements
    Gehalt As Single
End Type

Sub Benutzerdefiniert()
    ' Declare a single variable and an array of the user-defined type
    Dim S As Person
    Dim T(1 To 5) As Person
    ' Assign values to the components of the variable S
    S.Name = "Maier"
    S.PNummer = 17
    S.Telefax(1) = "0965-347767"
    S.Telefax(2) = "0975-227134"
    S.Gehalt = 2652.5
    ' Dimension the dynamic array before assigning values
    ReDim S.Telefon(1 To 3)
    S.Telefon(1) = "0965-347766"
    S.Telefon(2) = "0189-938439"
    S.Telefon(3) = "0975-227133"
    ' Assign the variable S to the 5th element of the array T
    T(5) = S
    ' Output elements of the user-defined variable
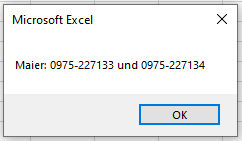
    MsgBox T(5).Name & ": " & T(5).Telefon(3) & " und " & T(5).Telefax(2)
    ' Pass the variable to a procedure
    BDTypAusgabe T(5)
    ' Note: Outputting the entire UDT directly is not possible
    ' MsgBox T(1).Name would show empty because T(1) was not assigned
End Sub

Sub BDTypAusgabe(x As Person)
    MsgBox x.Name & ": " & x.Telefon(3) & " und " & x.Telefax(2)
End Sub
Explanation
- The UDT Person has five components:
- Name: String
- PNummer: Integer
- Telefon(): Dynamic array of Strings
- Telefax(1 To 2): Fixed-size array of two Strings
- Gehalt: Single (decimal number)
- Before assigning values to the dynamic array component (Telefon), it must be dimensioned with ReDim.
- Assigning one variable of type Person to another copies all components, including arrays.
- You cannot output a variable of the entire user-defined type directly (e.g., MsgBox T(5)); instead, you output individual components explicitly.
- User-defined types declared without Private are project-wide, meaning all modules can see them. Use Private Type to restrict visibility to the declaring module.
Summary
User-defined data types allow you to group related, different kinds of data into meaningful units for clearer and better-structured code. This is especially useful when working with complex data sets or when passing related information as a single variable.